Sterling All-Terrain tow bar & SMI
'Silent Partner' braking system
We've sold the 'toad' for our Beaver motor home so the tow
bar, mounting brackets, rock guard, and auxiliary braking system are available
for sale.
The following tow bar components are available:
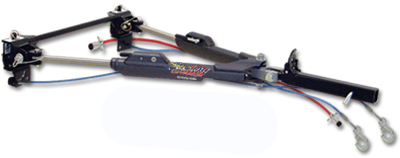
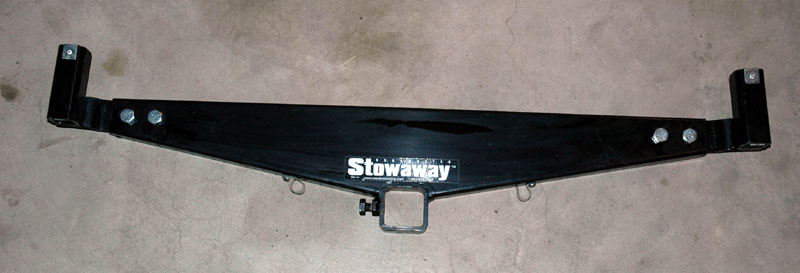
- Sterling All-Terrain Aluminum Tow Bar

-
Roadmaster XL-style tow bar brackets for 2002-04 Ford
Explorer
-
Roadmaster XL-style tow bar brackets for 1999-2000 Jeep
Grand Cherokee
-
Roadmaster 'Guardian' Rock Shield
-
Roadmaster #048-4 Hi-Low Hitch
Adapter
-
SMI 'Silent Partner' braking
system
Click on the arrow to go straight to the
component you are interested in.


Releasing your
towed vehicle is easy with ROADMASTER’s All Terrain tow bars — even when the tow
bar is at a hard angle, or the towed vehicle is out of level. Four familiar,
classic ROADMASTER tow bars: the StowMaster, Falcon, BlackHawk and Sterling, are
available in the All Terrain series. Each is upgraded with ROADMASTER’s
exclusive Freedom Latch, which releases the tow bar at any angle, level or bind
— first time, every time
There’s no more binding
with an All Terrain Freedom Latch™
The All Terrain tow bar comes with ROADMASTER’s exclusive
Freedom Latch
, which release the tow bar at any angle, level or bind — first time,
every time — even when the tow bar is at a hard angle, or the towed vehicle is
out of level. No other tow bar makes towing this simple!

Patented storage latch
Simply fold the All Terrain tow bar toward the motorhome and the storage latch
will “ click,”
automatically locking it in place. When you’re ready to tow, just bring the tow
bar up and press the storage latch to release the lock.
click,”
automatically locking it in place. When you’re ready to tow, just bring the tow
bar up and press the storage latch to release the lock.
Exclusive channel guides
The safety cables and electrical wiring cord are both routed through the
built-in channel guides. No need to wrap the cables or wiring.

Powder coated finish
Charged particles of pigment are sprayed onto the surface of the tow bar, then
baked at more than 400 degrees. The paint fuses to the metal. The result is a
uniform, thick and extremely durable finish — three times stronger than
solvent-based paint.
(The Sterling All Terrain — the world's strongest alumimum tow bar — has an
anodized finish. All other ROADMASTER tow bars are powder-coated.)
Sterling All-Terrain tow bar, complete with cover $550
Back to top of page
Roadmaster XL-style tow bar brackets for 2002-04 Ford
Explorer
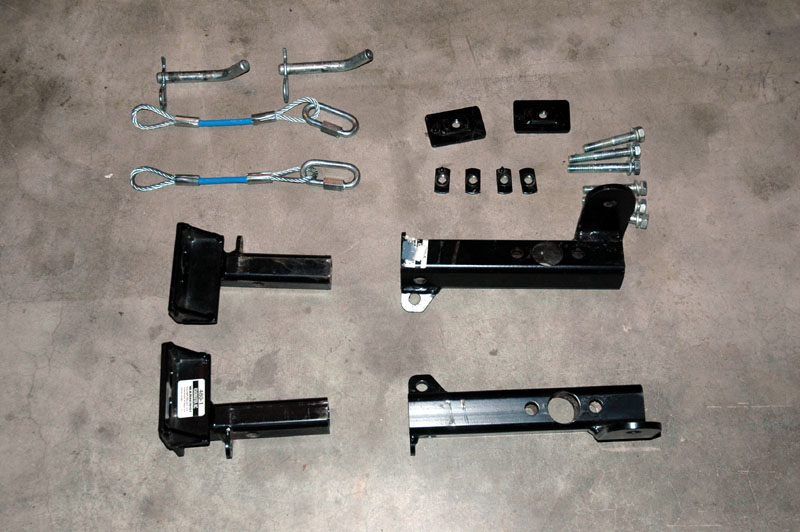
Explorer tow bar brackets complete
with all mounting hardware and instructions $200
Back to top of page
Roadmaster XL-style tow bar brackets for 1999-2000 Jeep
Grand Cherokee
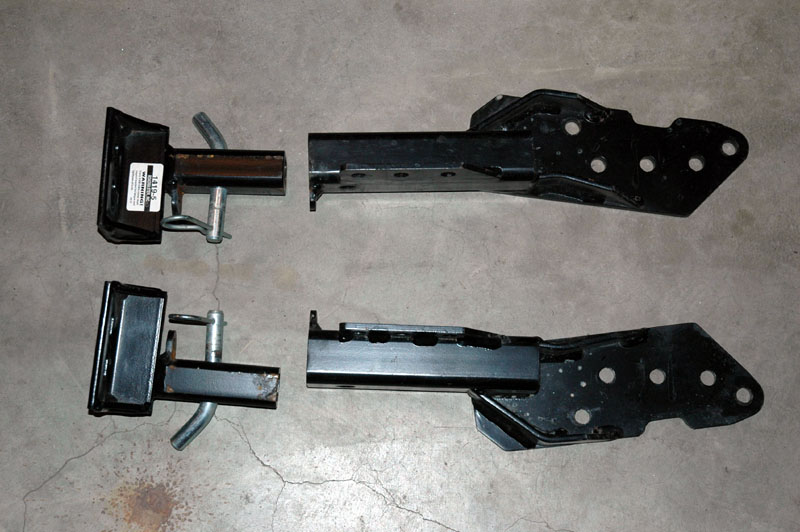
Brackets include both the front arm section and the
rear section that is bolted to the frame of the Jeep. Only a small portion
of the rear section is visible when the front arm is removed for normal use.

Jeep tow bar brackets complete with
all mounting hardware and instructions $200
Back to top of page
Roadmaster 'Guardian' Rock Shield
Protect Your Towed Vehicle and RV Against Dings and Rock Chips.
The Guardian is crafted from
rotationally-molded, high-impact polyethylene to absorb the impact of rocks,
gravel and road debris — instead of ricocheting it back at the motorhome. The
Guardian can be attached and removed in seconds, and fits all ROADMASTER tow
bars equipped with quick-disconnects. Can also be used with a tow dolly to help
protect your towed car by using Guardian bracket part no. 2000-8.
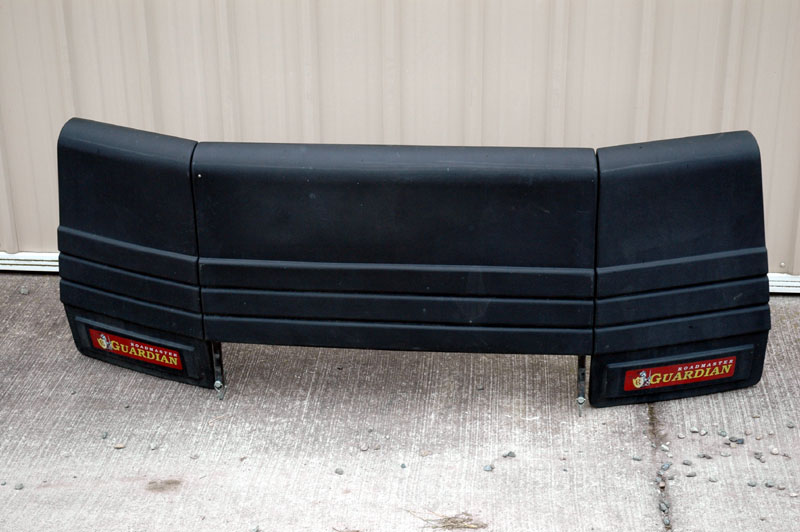
The Roadmaster 'Guardian' protects the front of the toad from damage due to road
debris.
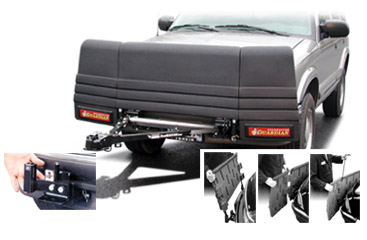
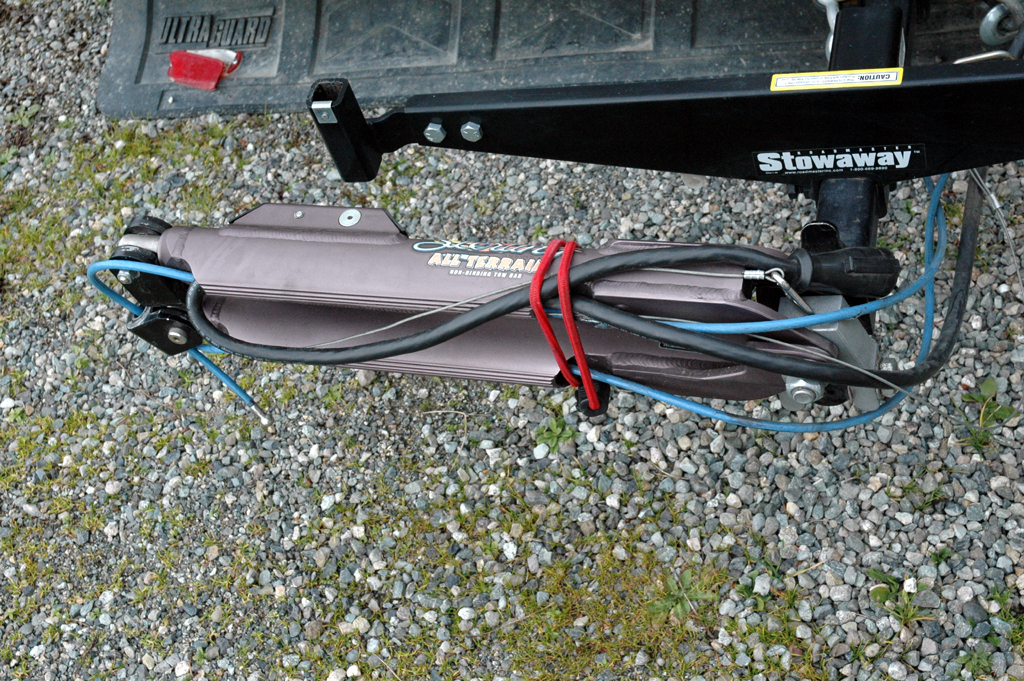
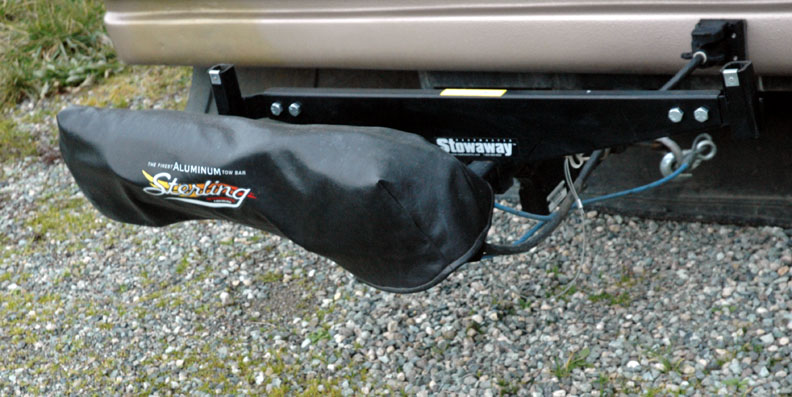
The Guardian 'Stowaway' for storing the Guardian on the motor home hitch when
not in use.
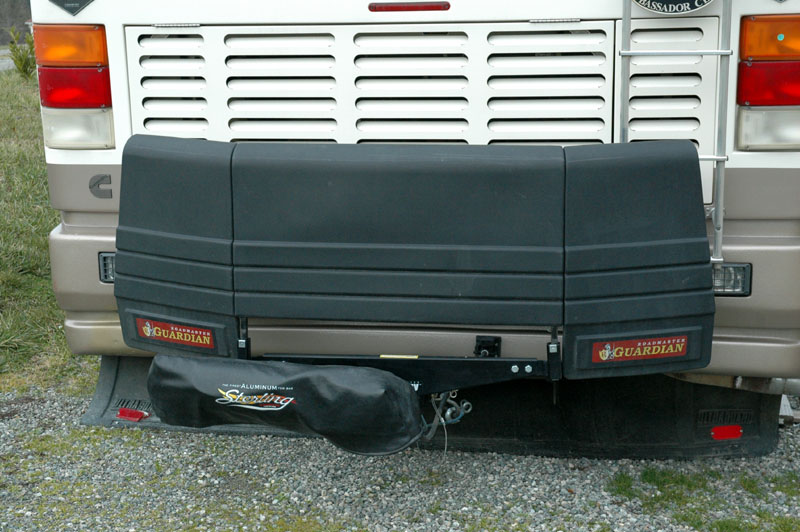
The Guardian mounted on 'Stowaway' the back of our
Beaver.
Our Guardian includes the Guardian Stowaway, a $75
option.
$275 for both!
Back to top of page
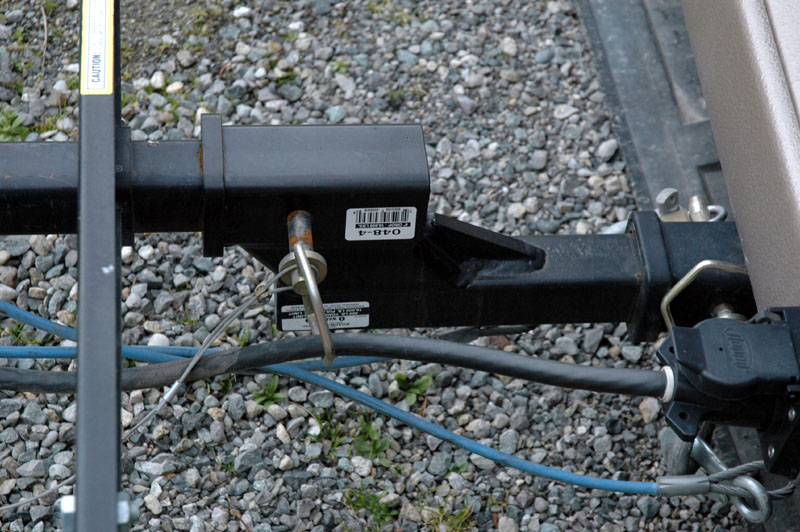
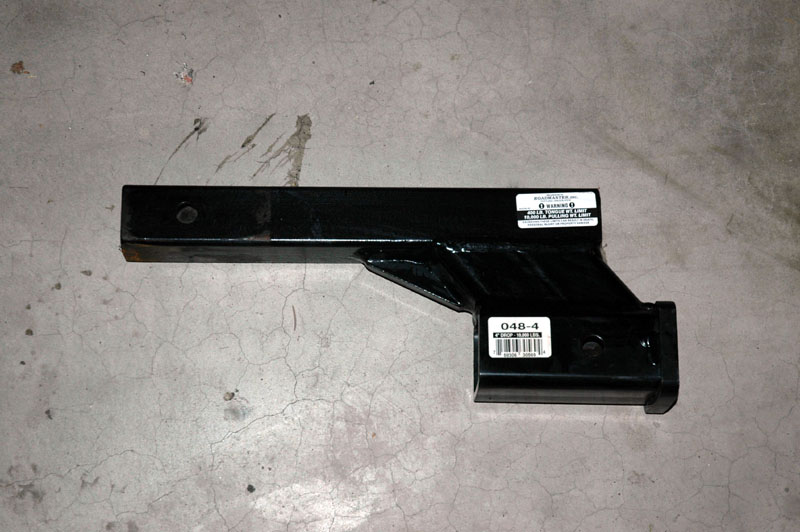
Roadmaster #048-4 Hi-Low Hitch
Adapter
Use a Hi-Low Hitch to level the RV hitch to the tow bar.
-
Four inch drop.
-
Fits all square tube hitch receivers with two-inch inner diameter.
-
10,000 lb. GVWR capacity; 400 lb. tongue weight max.
Practically new. Only $50
Back to top of page

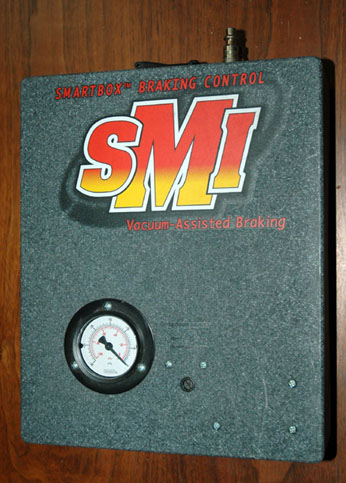 The SMI "SmartBox". Just one part of the whole system.
SMI 'Silent Partner' auxiliary braking system for the toad.
Read this product test for a better description of this superb auxiliary braking
system . . .
SMI Silent Partner Product Test:
Features:
* Drivers Control in the Motorhome
* Always Ready to Tow at the ÒFlip of a SwitchÓ
* Full Monitoring of Towed Vehicle Braking
The SMI Silent Partner Vacuum Tow Braking System is a wireless
brake system. A radio transmitter sends all braking and control signals
from the motorhome to the Toad and the braking action response from the
Toad is returned by radio. This means that there is no connection between
the motorhome and the Toad to activate the Toad brake. All SMI systems
require two signals to activate: First, the brakes of the motorhome must
be on and then the system measures the G-Forces using an electronic
printed circuit board. If above the preset level, the system activates
the Toad brake. In the event of a breakaway the system fully applies the
Toad’s brakes to ensure a safe stops. Anytime the Toad brakes are “On” a
monitor signal light in the motorhome turns On to alert the driver.
How it Operates:
The system operates by providing vacuum to the Toad’s power brake booster
and then drawing a vacuum cylinder (mounted on the upper portion of the
brake pedal arm) towards the floor to apply the brake and then releasing
it. The control box, which is about the size of a box of letterhead, is
usually mounted under one of the Toad’s seats and the hoses and wiring are
routed under the carpet to the pedal area and under the hood. In the
motorhome there is a control box to measure braking G-forces and a dash
mounted control box. In each vehicle there is a key-fob sized transmitter
and an antenna.
What I like the Best:
The feature that I like the best (besides it is always ready to tow) is
that SMI Silent Partner System allows me to adjust the G-force
level at which the system activates at any time. On newer coaches like
mine when the exhaust brake is “On” the coach’s brake lights are “On” This
provides a brake signal that (if the system is set to its most sensitive
position) would put the Toad’s brakes to come on. I am able to adjust this
so that using the exhaust brake to scrub off speed (like letting of the
accelerator on a gas rig) even though my brake lights are “On” the Toad
brake does not come on preserving the Toad’s brake pads and extending
their life.
Installation:
The installation instructions were quite clear and understandable. There
is a toll free 800 telephone number which you can call before you begin to
seek out hints in making the installation simpler.
I installed the SMI Silent Partner in a 2000 Ford Focus, and a 2002
Bounder 39 foot diesel. The Focus has some peculiarities that made the
installation longer and somewhat more difficult than a typical tow
vehicle. The system box was located under the passenger seat and the hoses
routed along the console under the carpet to a small hole drilled through
the firewall and protected with a wire feed-through grommet. This location
is not typical, however there was a large seat adjustment arm under the
drivers seat that prevented the box from being completely hidden on that
side. Since this car is often used for passenger carrying, I elected to
place it completely under the passenger seat. If the drivers side location
had been chosen there would not have been any reason to drill a small
hole.
The under hood work involved running a wire to the battery area for power,
another to a suitable ground location, one wire connected to the breakaway
switch which was mounted in the center of the grill below the license
plate. The remaining wire from the breakaway switch was routed up to the
battery and connected together with the power wire through a supplied fuse
holder. The 3/8” black vacuum line was run up to the power brake booster
and the existing hose was cut in a straight location, a check valve
installed and a “Tee” to which the new hose was connected. All hose
connections were clamped with the supplied hose clamps.
The receiving radio antenna was mounted on the top left hand corner of the
driver’s windshield in a location that is hidden by the sun visor. The
cable was routed down the pillar and across the lower dash and plugged
into the control box. I did have to buy an extension cable, which was a
single RCA to RCA pin plug cable used on stereo equipment and a double
female coupler. This was only required because of my right hand side
location. The small radio transmitter fob was placed above the doorpost
(the ‘B’ Pillar) on the lower headliner between the doors. It is attached
with a small hook and loop fastener (Velcro). The remaining wire from the
harness was routed over to the Toad’s brake switch and connected to the
cold side (the side that gets power when the pedal is depressed). On the
Focus this switch is without power when the key is off (an unusual
situation) so power from another live source was fed through a 6-amp diode
to the Hot side of the switch so that there would be power to provide the
transmitter with a brake signal. Although I knew how to correct this
problem, SMI is able to provide hints like this on the rare car that
requires this solution.
The vacuum cylinder was installed on the brake pedal arm with the cylinder
on the right side (closest to the gas pedal) because this car has a manual
transmission and a clutch pedal. The cylinder was up high enough that it
did not interfere with the driver’s foot when braking and it is away from
the accelerator. All the hose lines were connected with quick connect
vacuum fittings and they were installed on the respective locations, a
fuse installed in the holder and the system powered up for a few seconds
then stopped. I watched the vacuum gauge to see if the meter needle stayed
where it stopped. It did, no leaks. Pressing the Test button caused
the pedal to move as if I was braking, occasionally the vacuum pump inside
the system box would run to replenish the vacuum.
In the motorhome the control module was mounted high up on the front
vertical wall of a forward cargo bin. It must be mounted at a right angle
to the road surface to give the proper G-force signal. The power and
ground wires were fed up through the top of the bin to the front fuse
panel and ground. The Brake signal wire was connected to the “cold” side
of the brake switch located under the floor beside this cargo bin at the
brake treadle valve. The control network cable, transmitter and receiving
antenna wire were fed from the driver’s areadown into the bin. I mounted
the Control Panel on the left side of the dash in an area that is clearly
visible when driving and within easy reach to allow adjustment of the
Sensitivity Control and switches. It was mounted with hook and loop
fasteners (Velcro). A network cable plugged in the bottom and was neatly
hidden under the dash. The key fob transmitter and receiving antenna are
mounted after testing the system.
Testing:
To test the system I drove the Focus behind the motorhome in approximately
the position it would be in when towing. I placed the motorhome antenna
and transmitter against the side window and with the ignition key on in
the coach I pressed the manual button. On the dash unit a light labeled “Coach”
immediately glowed and a split second later when the Focus brake was
applied the “Towed Vehicle” light came on. It took a few minutes to
find an appropriate location and, before affixing the antenna and
transmitter, I started the rear diesel engine. This did cause some
relocation of the antenna and transmitter but within a few more minutes I
had found a location that consistently provided reliable communication. I
used an alcohol pad to clean the area on the wall panel below the left
side dash controls and affixed the antenna and transmitter.
Daily System Check and Use:
Each time I tow, I turn on the system power switch, press the test button
on the system box, confirm pedal operation and that a green light on the
transmitter is flashing. This light confirms that the radio transmitter is
sending the braking signal. I remove the dummy breakaway plug and listen
to hear the system vacuum pump run, then insert the proper breakaway plug
and connect the end of the cable to the motorhome. (This length of the
cable is determined by making sure that the pin is pulled by the time the
tow cables are becoming stretched out.) In the beginning I also would go
to the Coach with the breakaway pulled and with the ignition on, look to
see that the “FAIL” LED was lit and that I heard the warning tone
signal.
In the coach I apply the manual button and watch as first the “COACH”
LED then the “TOWED” LED light up. I usually run with the Real
Time/Latched switch in the “Real Time” position. The difference
is that when in the Real Time mode and the system engages the Toad
brake the system will release when the G-Forces are once again below the
threshold level that activated them, even though I may still have the
coach brake on. In the “Latched” mode the Toad brake stays on until
I drop below the G-Force activation level and release the brake.
Technically, if I activated the Toad brake while coming off a freeway ramp
and never released the brake pedal the Toad brake would be on in this mode
even when sitting still at a stoplight.
Summary and Conclusions:
The SMI Silent Partner Vacuum Tow Brake System is an amazing and
safe braking system that instills driver confidence. Using this system is
as simple as tow brakes can get. I spent a total of four hours installing
the system and would estimate about an hour was due to irregularities
found on the Focus. The installation is clean, unobtrusive and the Focus
was driven all through the Canadian winter with boots on and there was
never any problem with hitting the brake cylinder. I use the system and
highly recommend it to anyone considering a Tow Braking system
Robert Lowe
President
RV-Parts Plus
Everything is included: the vacuum pump assembly, control panel, brake pedal
vacuum cylinder, system antennas, wiring, hoses, couplers, instructions.
$750 for the entire SMI braking system.
03/26/2008
