Building an Arctic Fox 29V
Unlike most RV manufacturers, Northwood builds their coaches in batches - one model at a time on one of three assembly lines. A model run for a popular model like the 29V might last a week or more before shifting to the next model. Building the coaches one model at a time is not only more efficient for Northwood which helps keep their costs low, but this means that the workers tend to make far fewer mistakes because they aren't constantly faced with a confusing array of models & detailed differences in how and where things go.
Since we'd ordered a Model 29V travel trailer, we timed our factory tour to coincide with the build of our own coach.
Here are the photos of the 29V production line, as well as a few others thrown along the way.
The Arctic Fox 29V floor plan
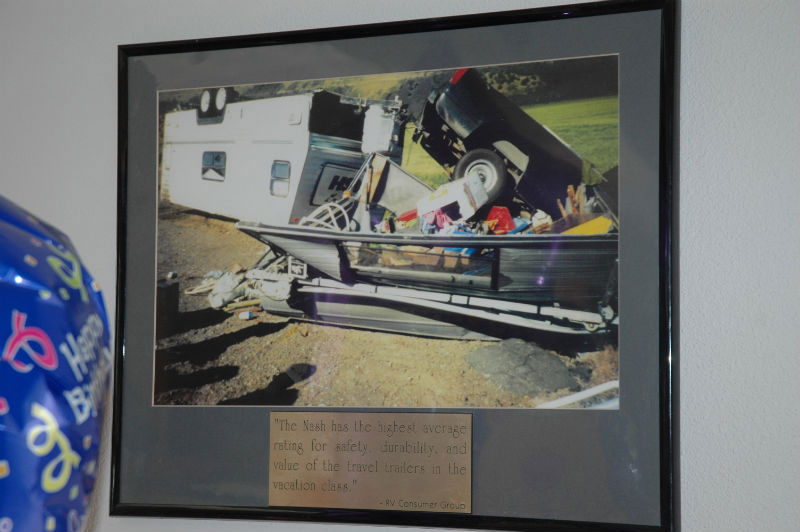
This photo of a wrecked Nash shows just how strong Northwood builds its RVs. The trailer is intact after a rollover instead of a debris field.

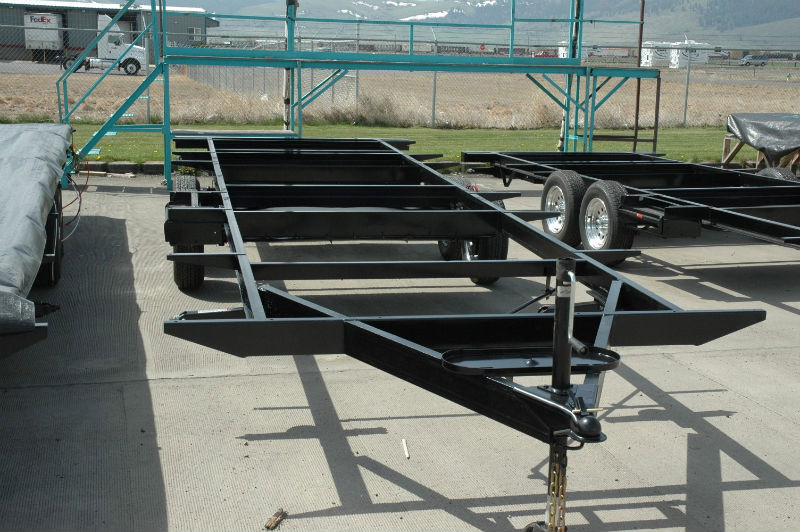
These are the basic chassis of some smaller travel trailers that we spotted on our way to the 29V assembly line.
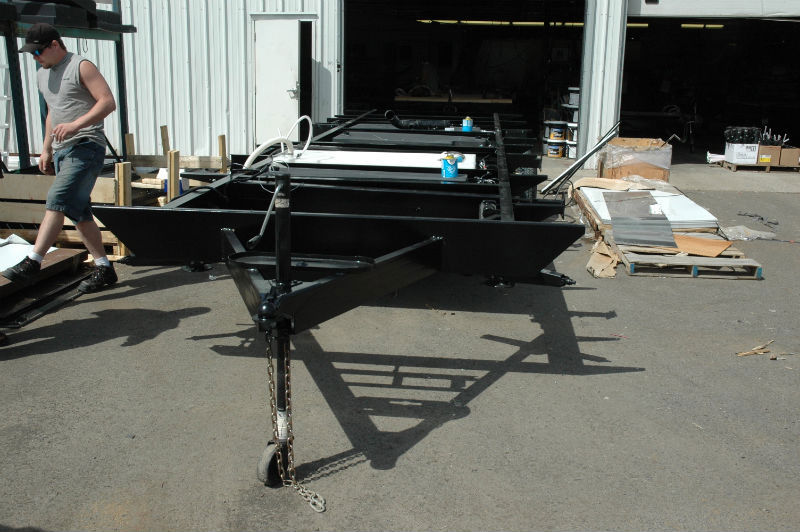
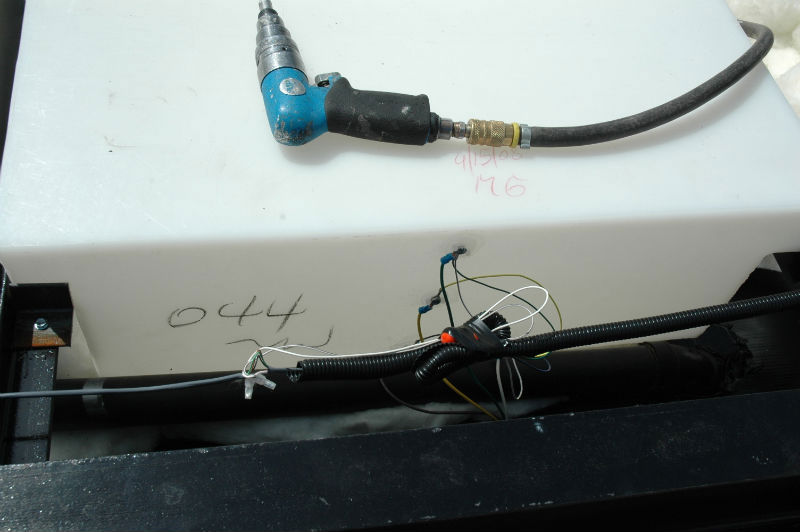
This is our first photo of a 29V travel trailer under construction. The holding tanks are being installed and plumbed
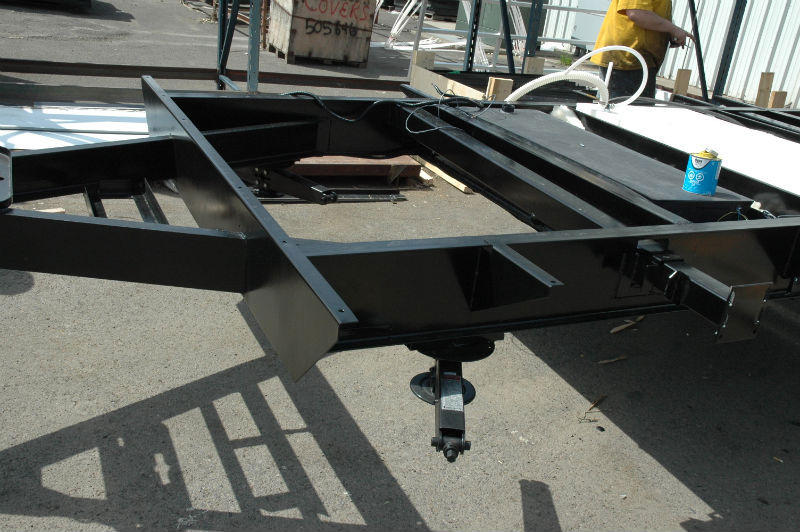
Forward section of frame, stabilizer jack and front slide mechanism
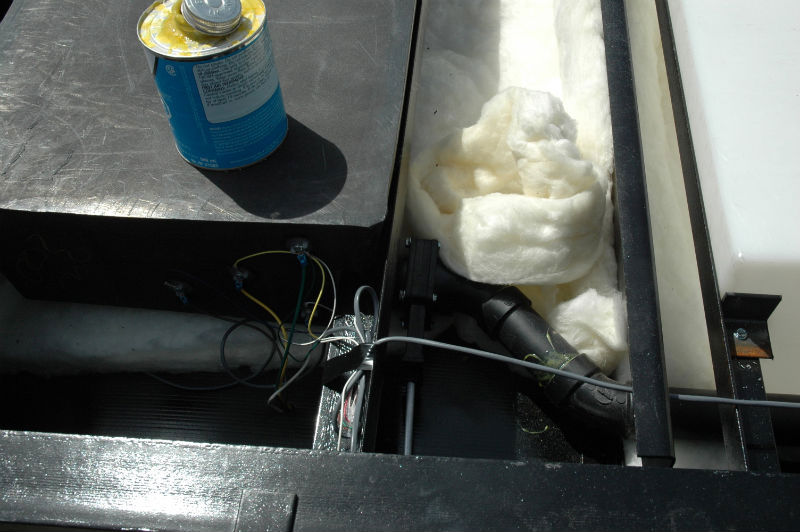
Holding tank & insulation detail
The front (galley) holding tank on left and the fresh water tank on the right
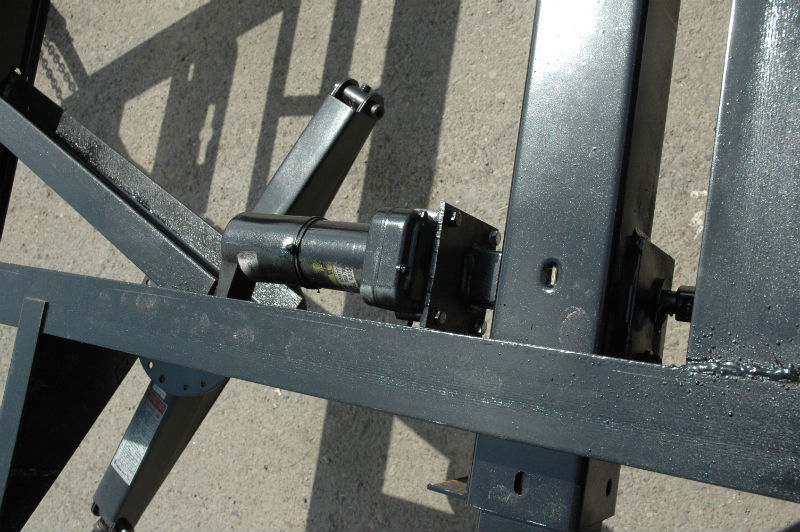
Front slide (living room) mechanism

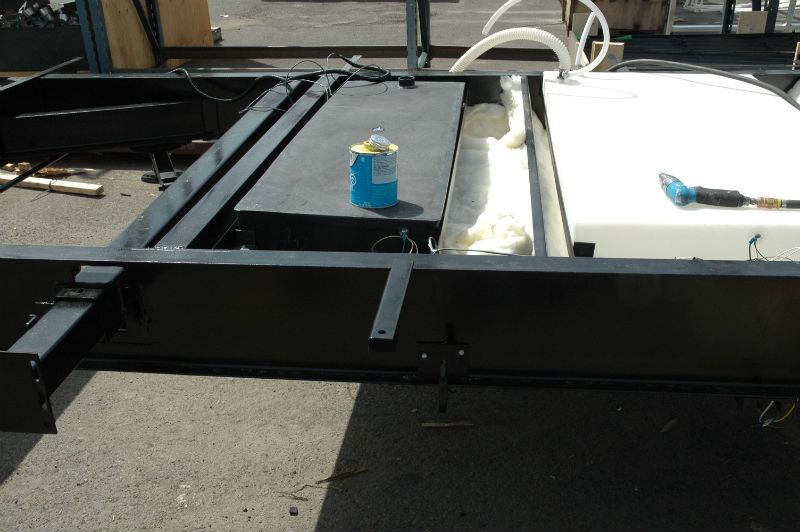
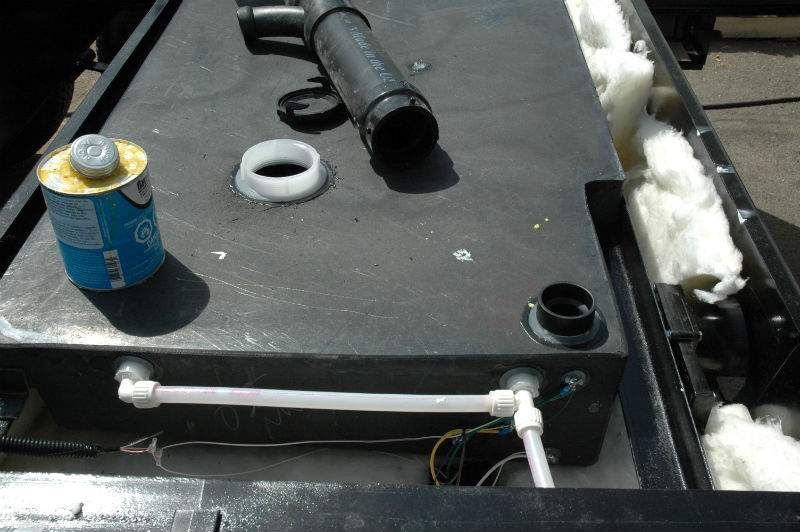
Moving further back we pass the fresh water tank and get to the aft gray tank (shower & vanity sink) and the black tank last.
Fresh water tank level sensors.
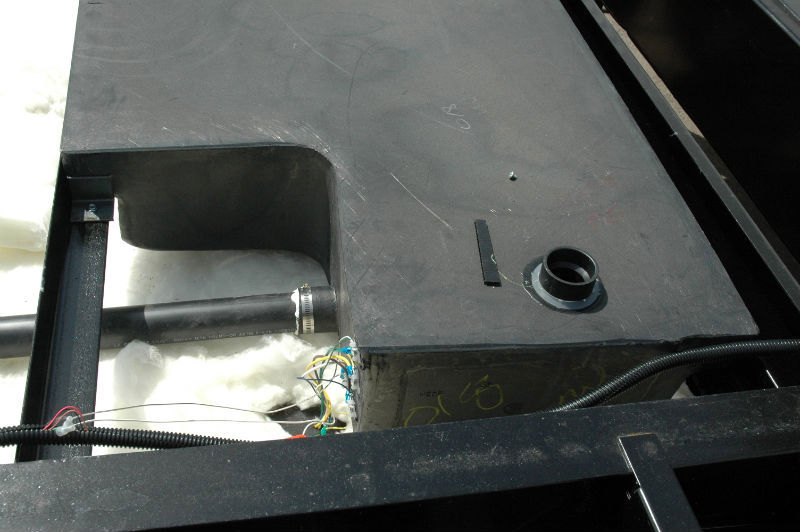
Bathroom gray tank.
Black tank
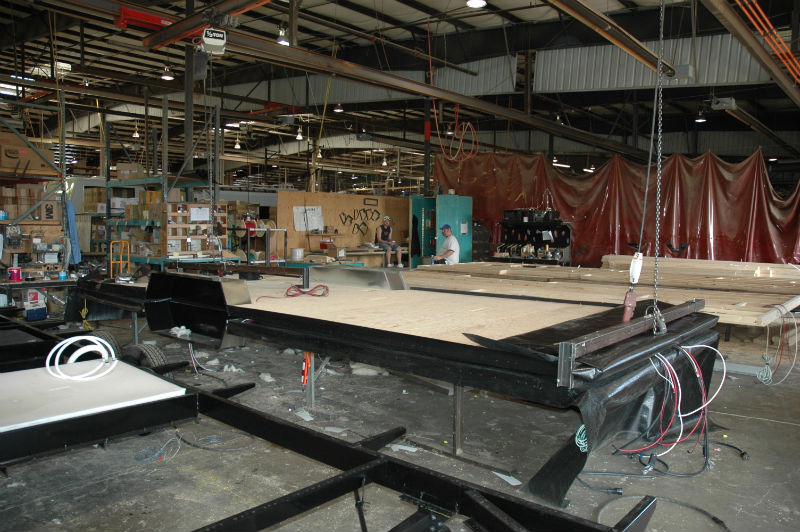
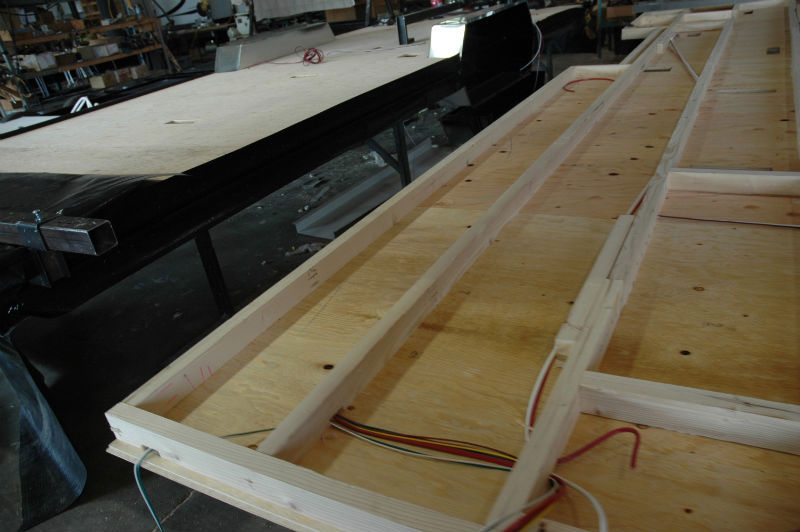
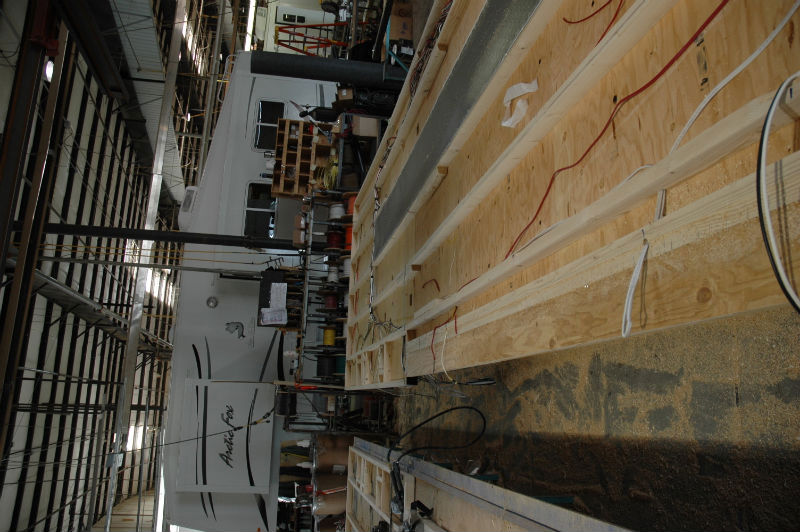
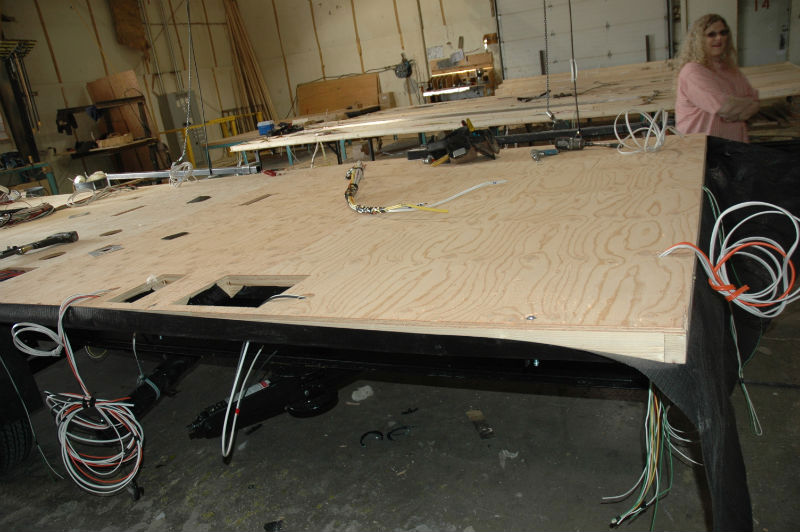
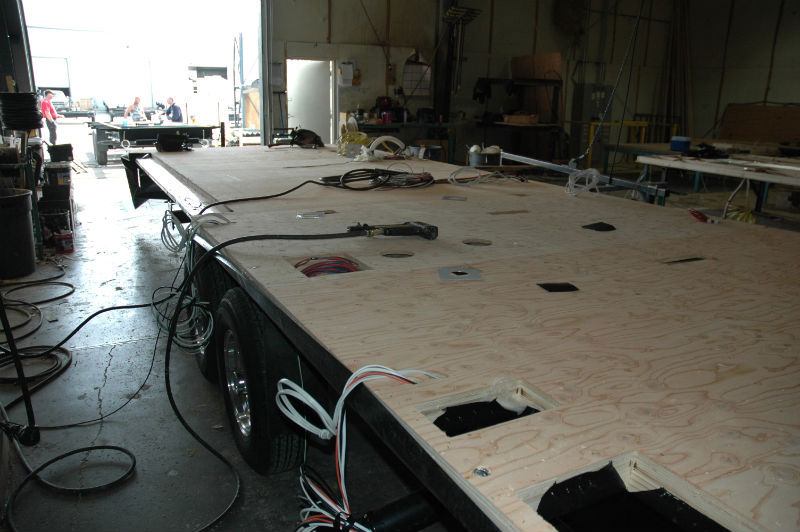
The floors are assembled next. The floor in the center of this image is nearly complete. They start with a layer of plywood, and then a framework of 2x2's. The electrical wiring is routed throughout the floor before adding the second layer of plywood. Then the floor assembly is wrapped with waterproofing fabric before being placed on the chassis.
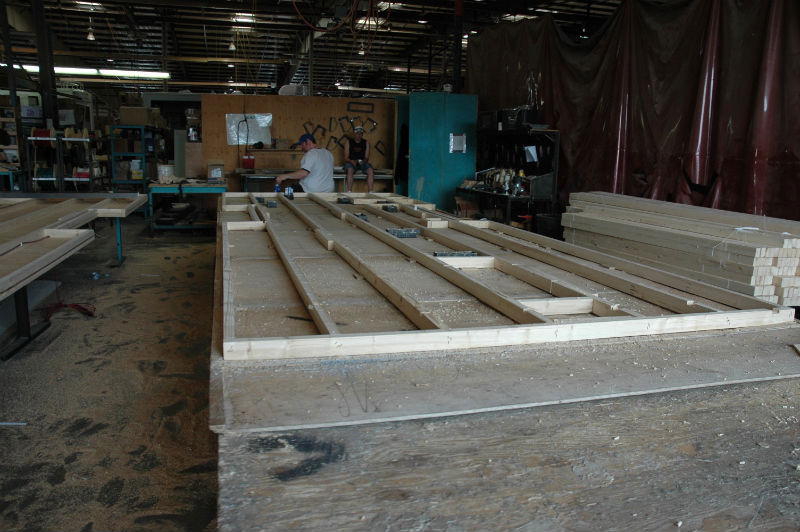
Laying out the framing in the floor
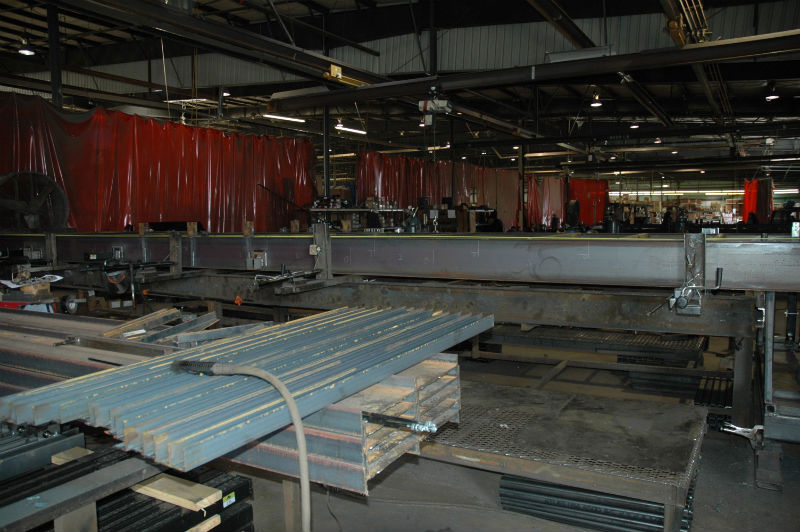
This is the frame shop where they were building 5th wheel chassis. The first photo isn't very revealing.

This photo shows a 5th Airborne pin box being installed. Note the size of the steel beams as well as the angle iron braces on the pin box support.
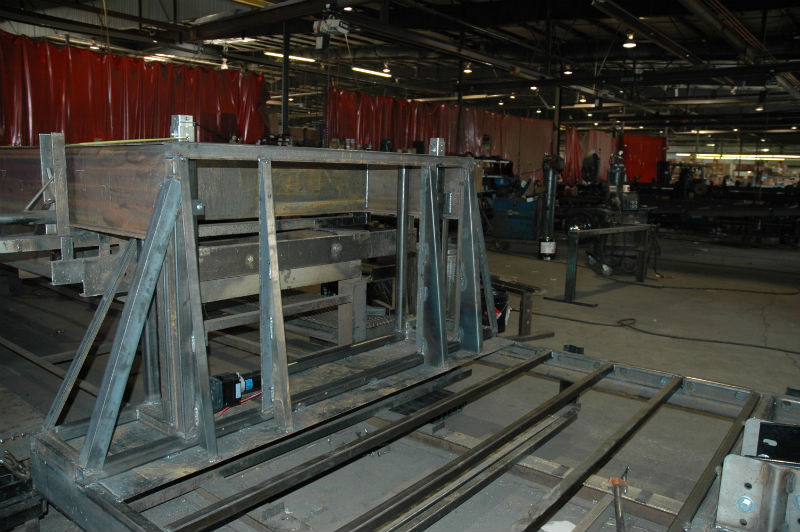
Now, this one is more obviously a 5th wheel. Note the size of the frame rails and the extensive supports & bracing
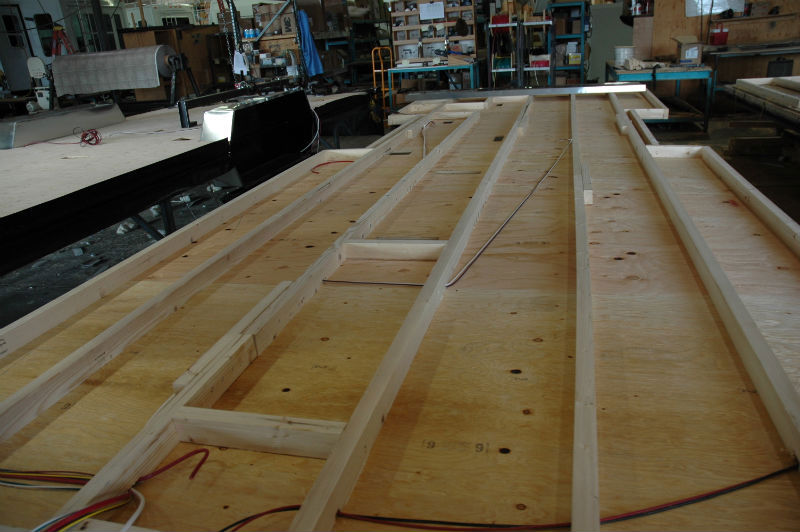
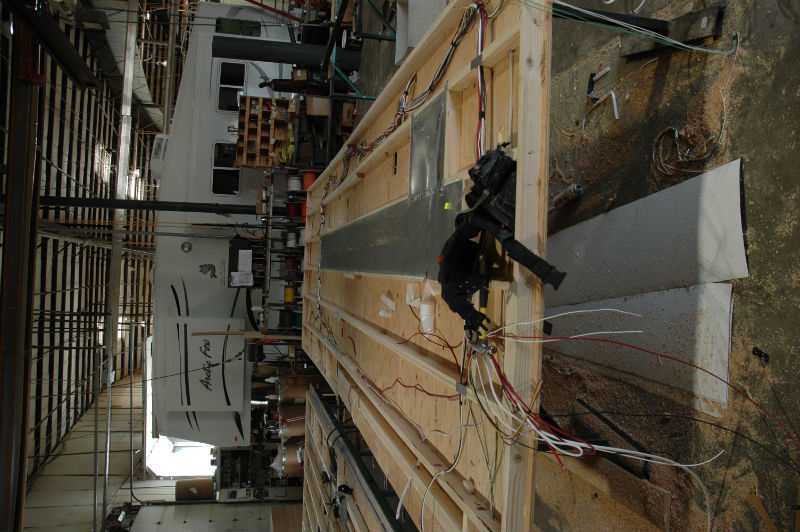
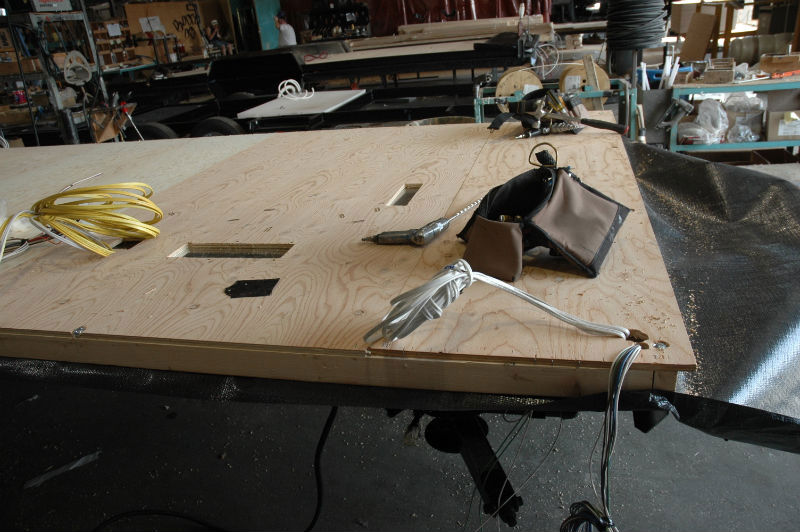
Back to the 29V line and we're running wires in the floor
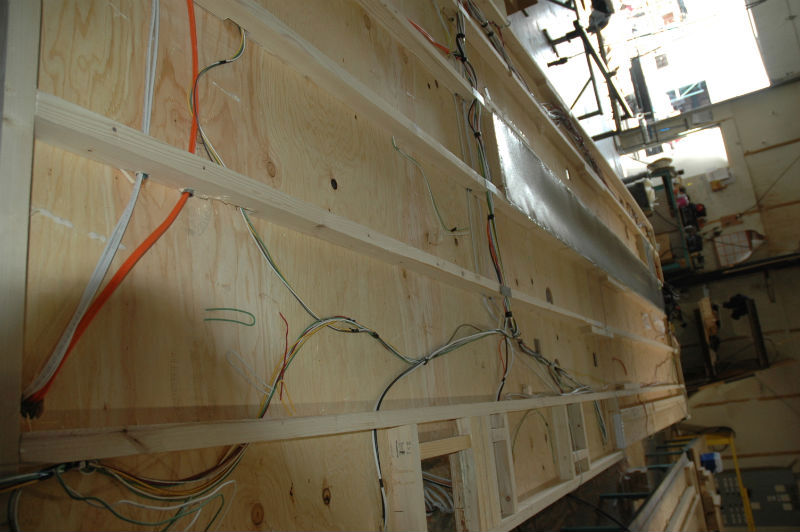
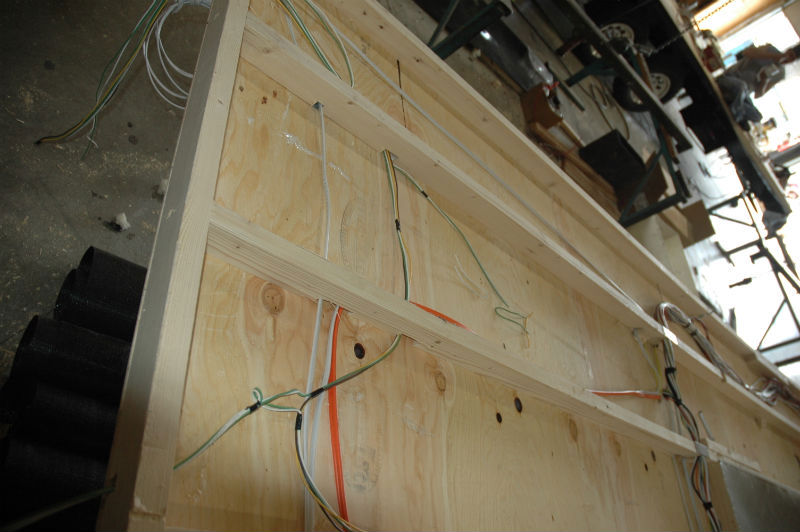
More wiring photos. This is the right front corner of the coach.
Heater ductwork is being installed in the floor. Sorry for the sideway photo--these will be straightened up as I work in this page.
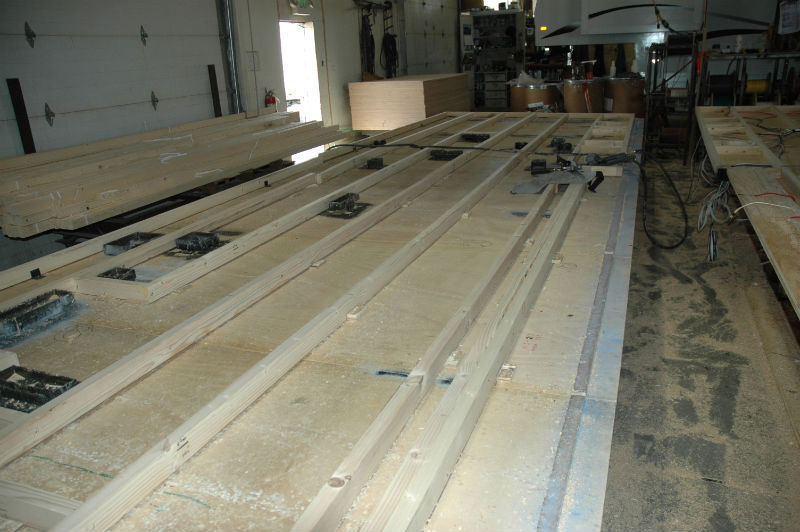
A floor with an array of furnace ducts
A few more sideways photos for your viewing pleasure! :-)
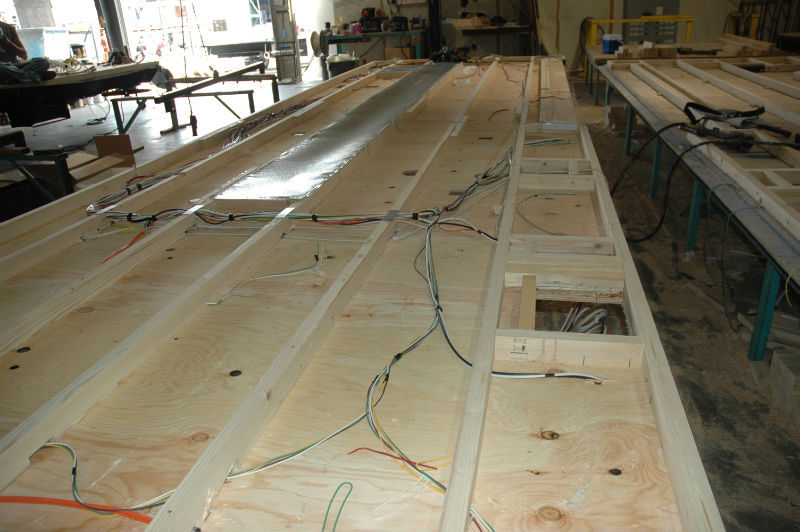
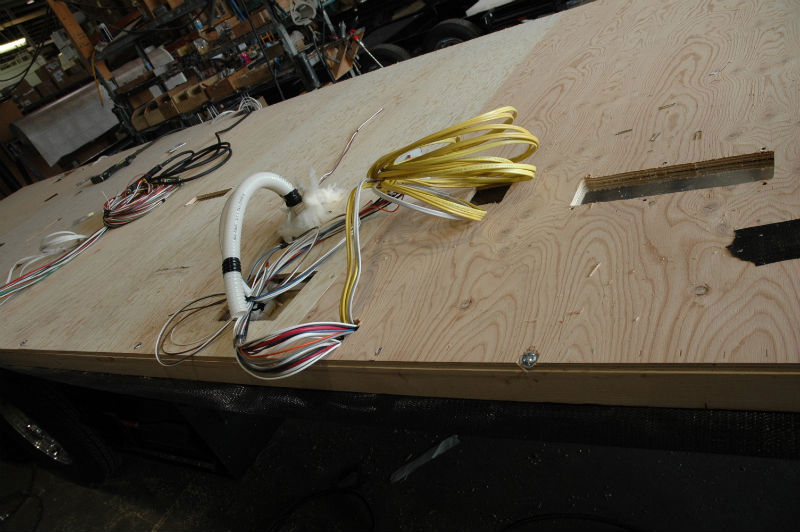
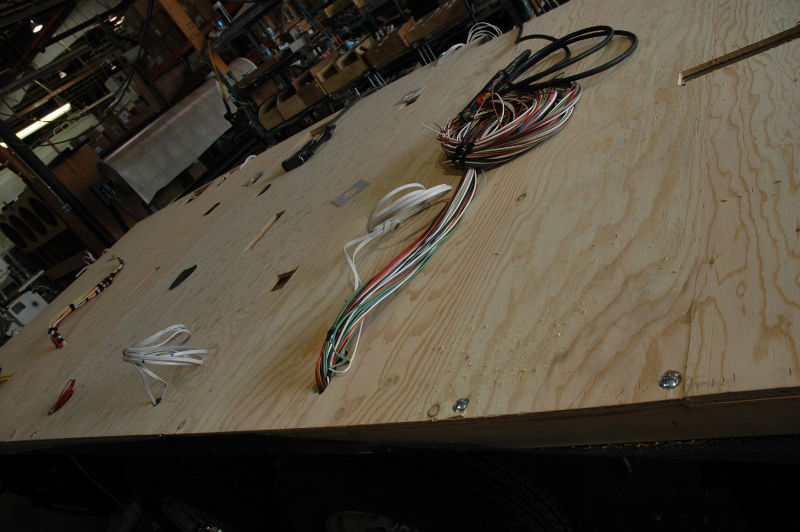
I took lots of photos of the wiring stages so I could review them later if I need to troubleshoot something or wanted to make some modifications.
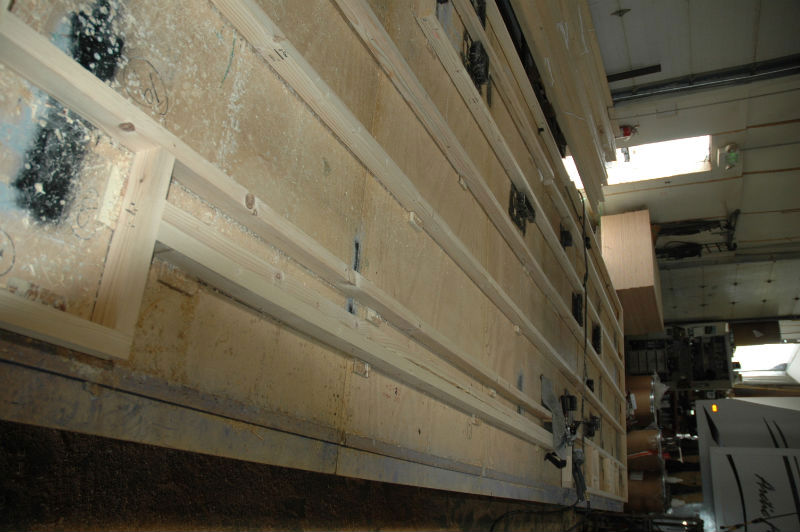
The second deck of the flooring is in place and the wiring harnesses are pulled for the runs up the walls

The cabinet shop is located right next to where the cabinets are installed in the assembly line.
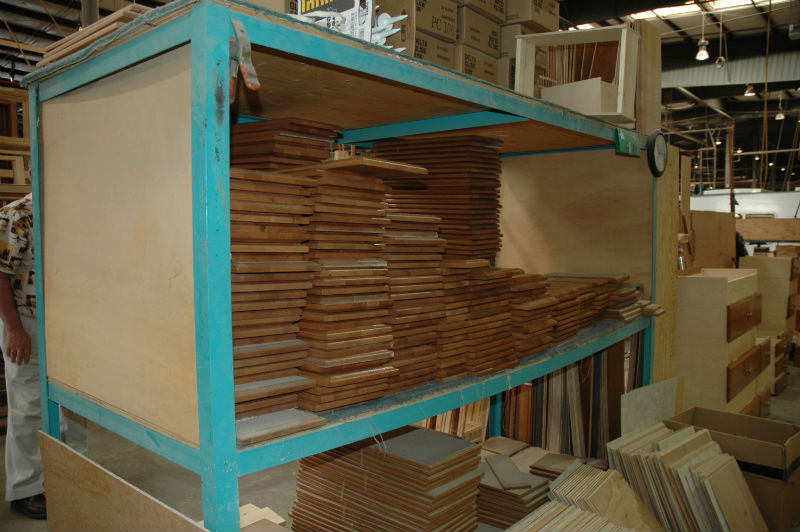
A few cabinet doors
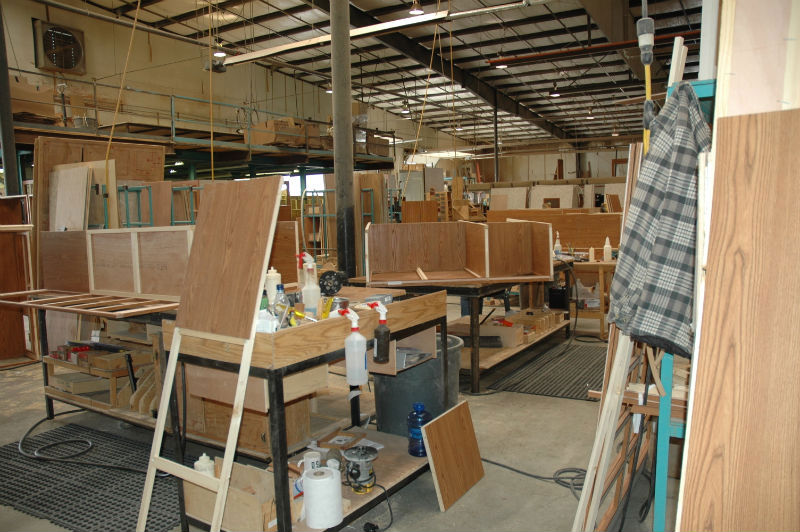
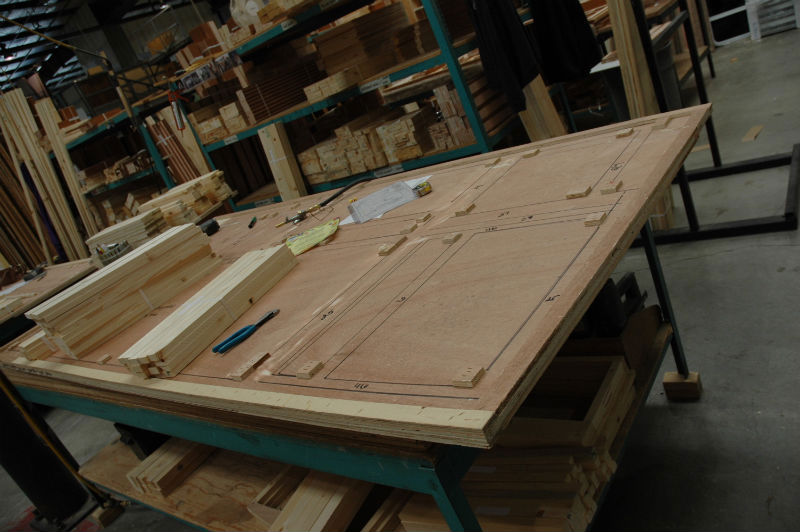
Each floor plan has its own cabinet layout jigs. The jigs let the workers build the cabinets to the exact same size and squareness every time. There is a rack of jigs for the various floor plans in the cabinet shop.
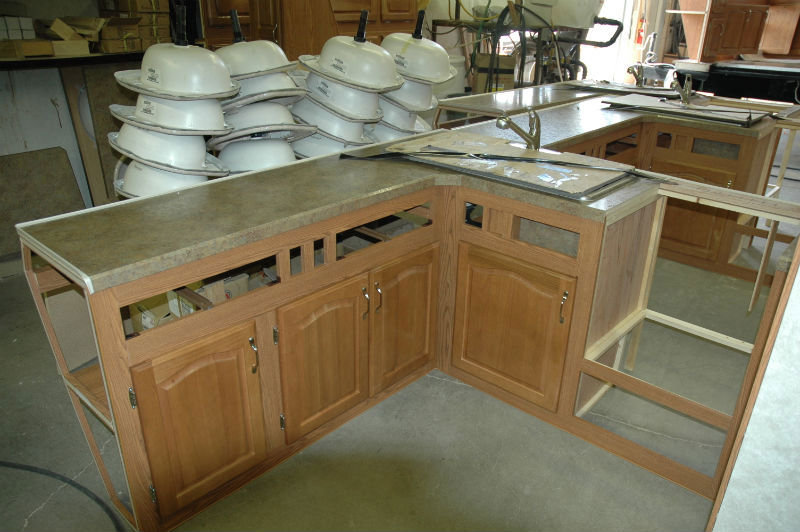
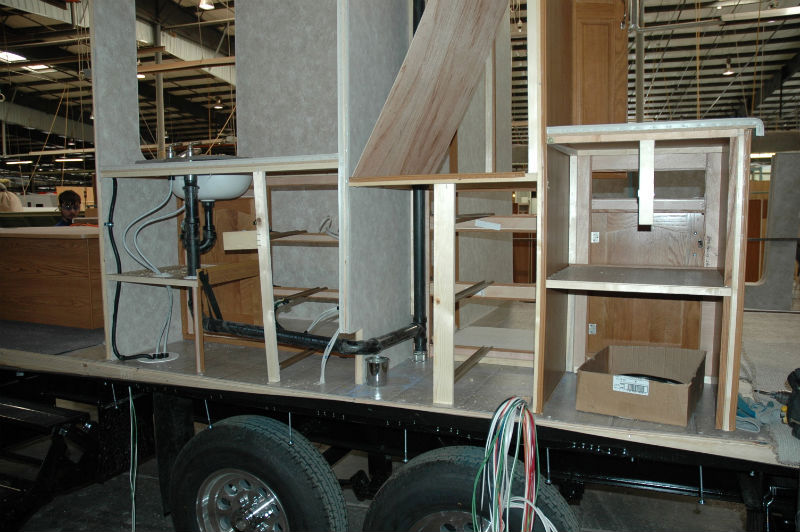
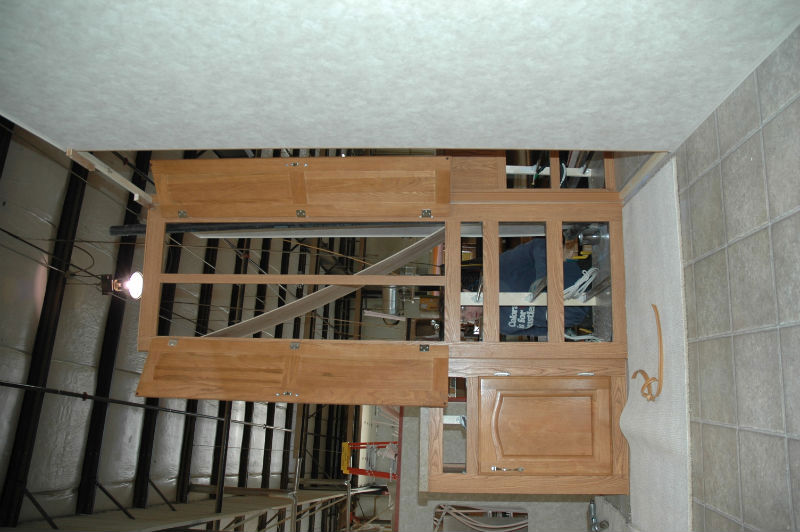
The kitchen cabinet that runs across the front of the coach. The stainless sink is already installed, but the range is still just a big hole.
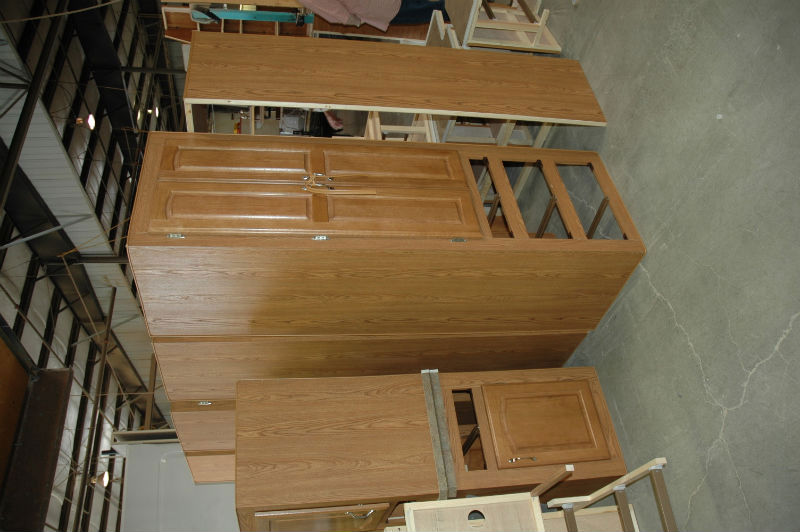
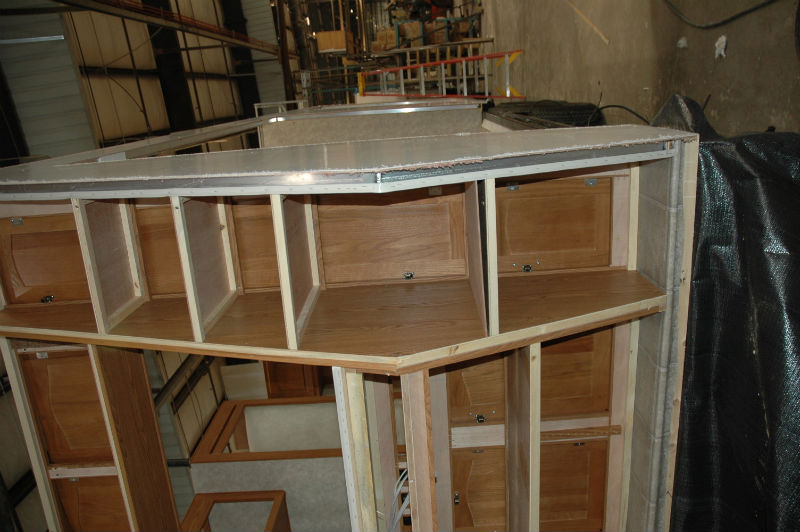
The tall cabinet is the hallway wardrobe closet with 3 drawers. The short cabinet is actually 2 entry/TV cabinets, the top one is upside down.
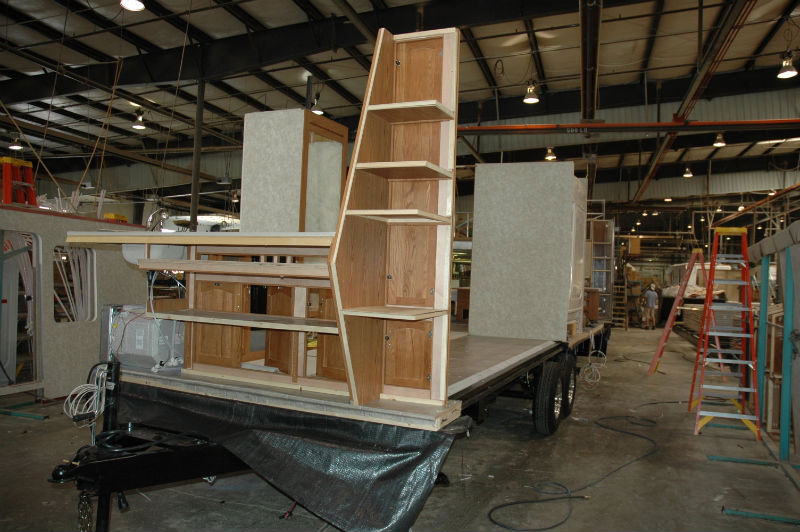
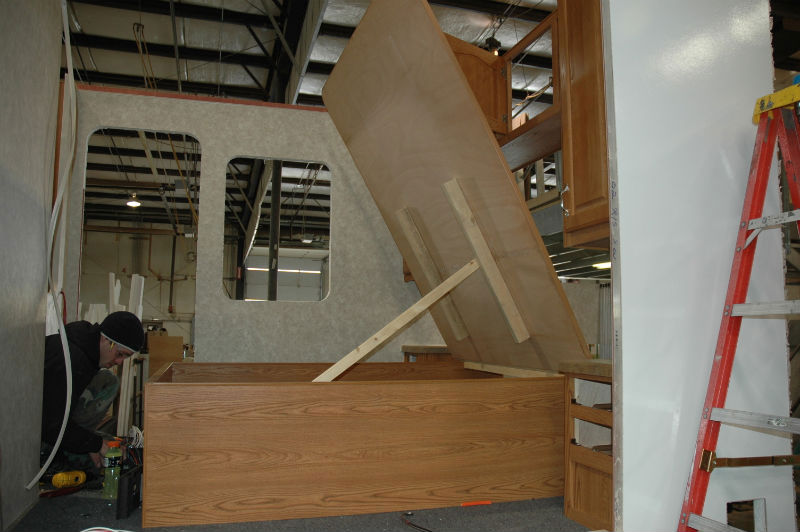
This is the left rear corner of a 29V. From left to right: the living room, the shower and the bedroom. You're seeing the frame of the pedestal bed and one nightstand.
This is our coach on the assembly line.
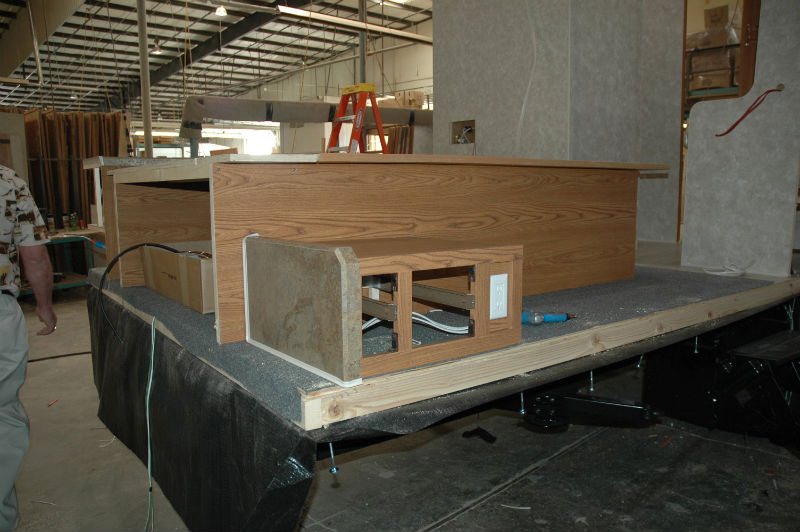
The left front corner. Left to right: The kitchen sink over the hot water heater, the wide stretch of galley counter, the pantry in the left front corner, the opening for the large livingroom/dining room slide.
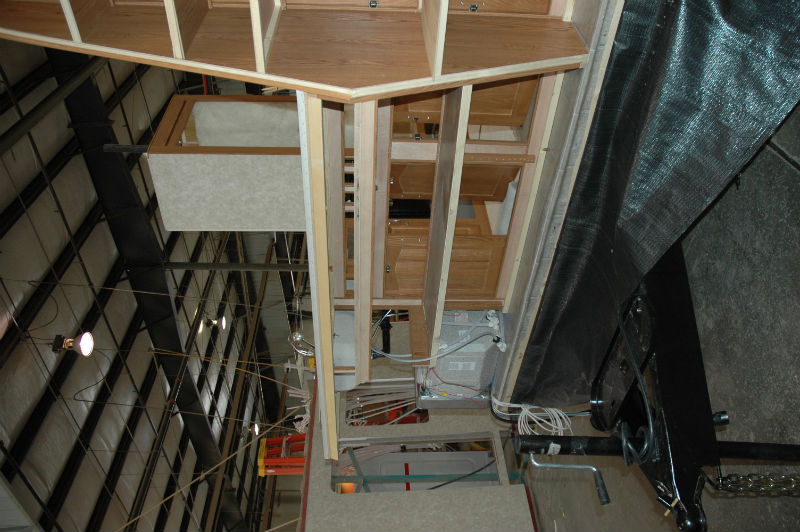
Another view of the front of our coach
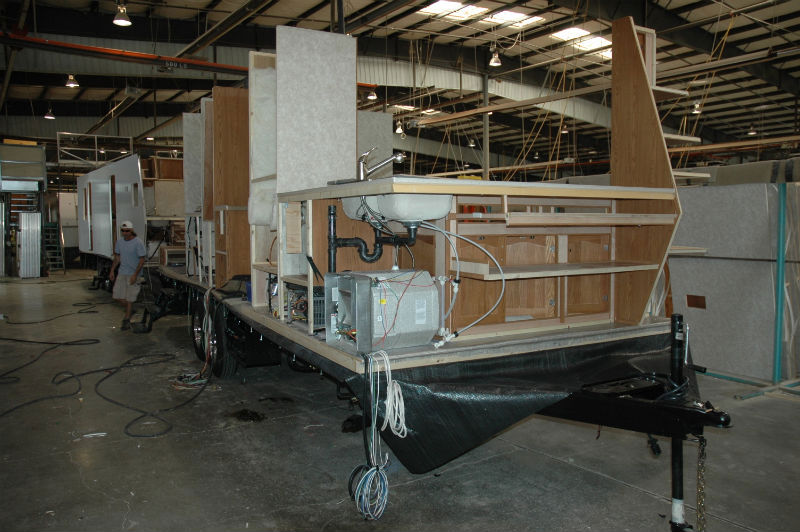
And yet another view of our coach
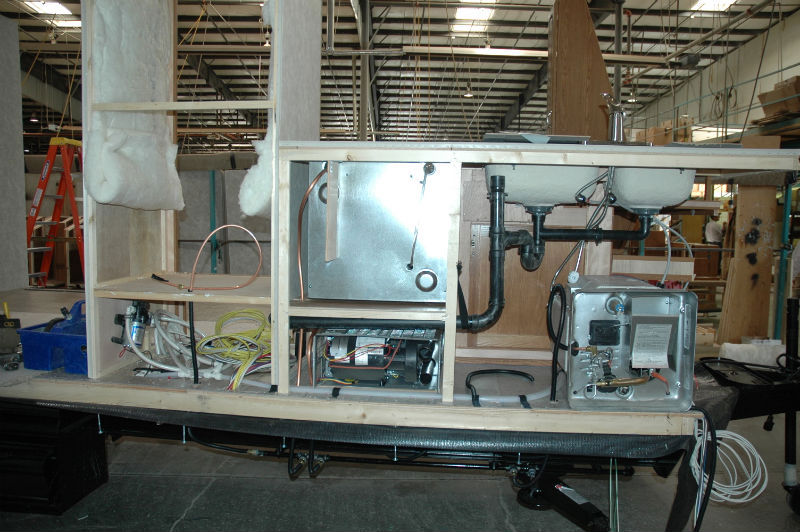
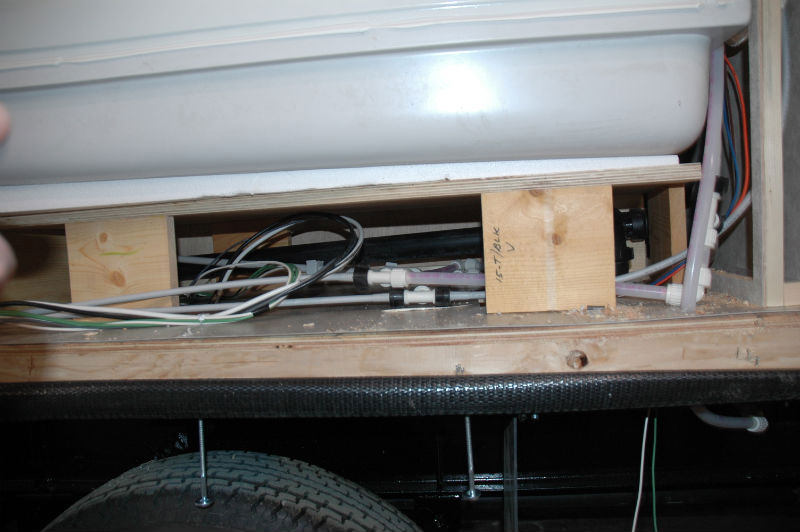
A more detailed view of the backside of the galley appliances in our coach. Left to right: water pump under refer space, range over furnace, sink over hot water heater.
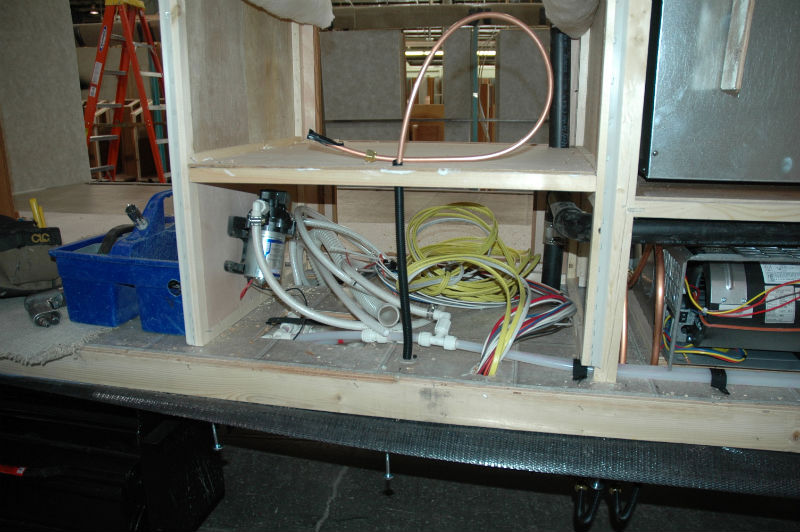
A close up of the water pump setup
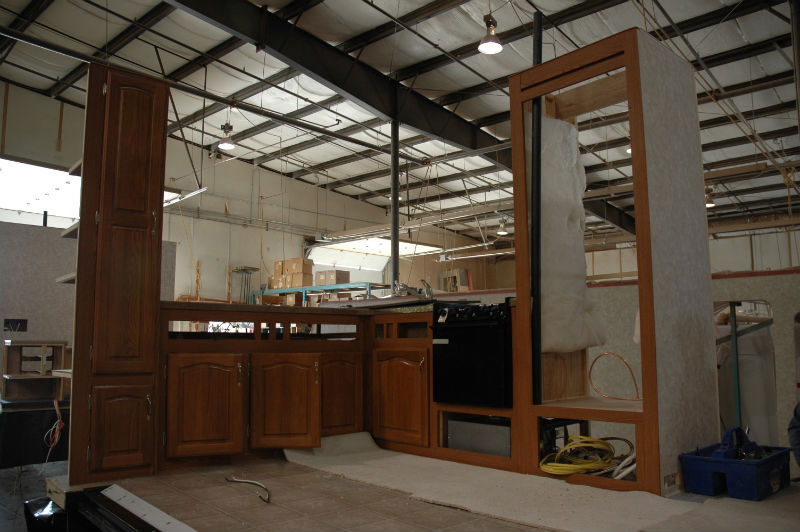
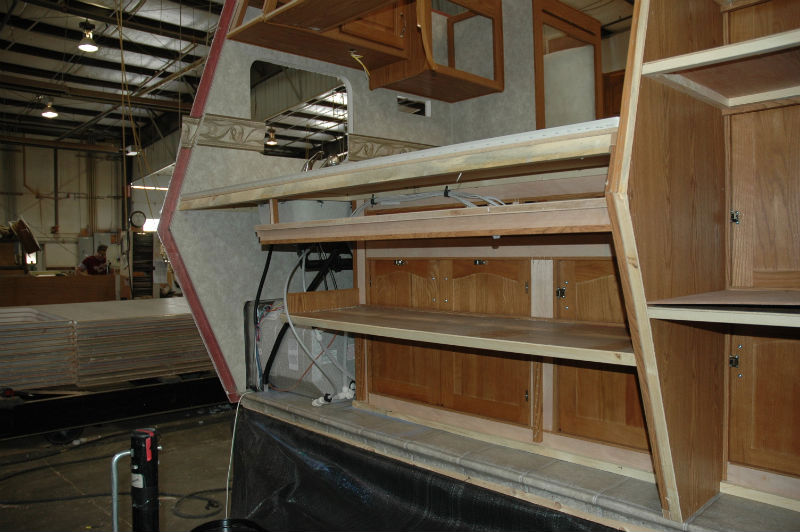
The back side of the cabinetry aft of the front entry. Left to right: bedroom, bathroom vanity sink and cabinet, wardrobe cabinet over 3 drawers, TV cabinet with one drawer.
The right rear corner of our coach. This nightstand is taking a siesta before being properly installed.
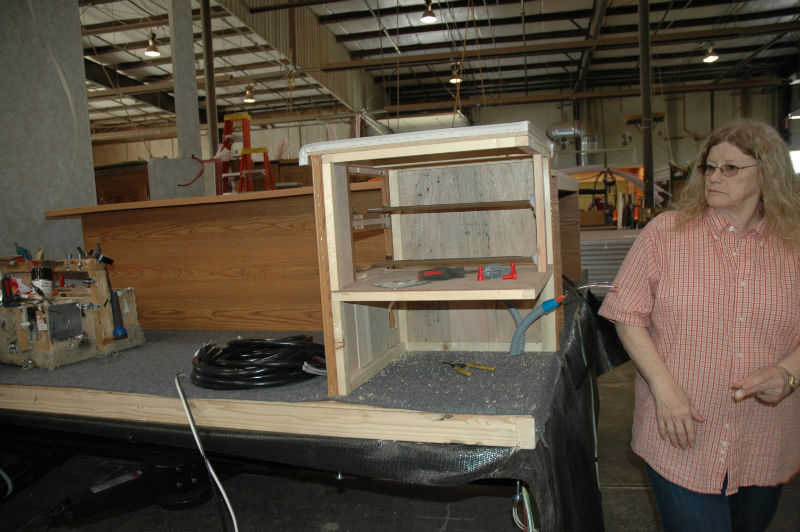
CJ checks our 'her' nightstand. The shore power cord will live in the bottom section of this nightstand.

The plumbing in the wall between the shower and the bedroom. Yes, there is a service access hatch in the bedroom.
The plumbing under the shower tub
A view of the wardrobe cabinet and TV stand
The galley from the slide hole
The slide hole
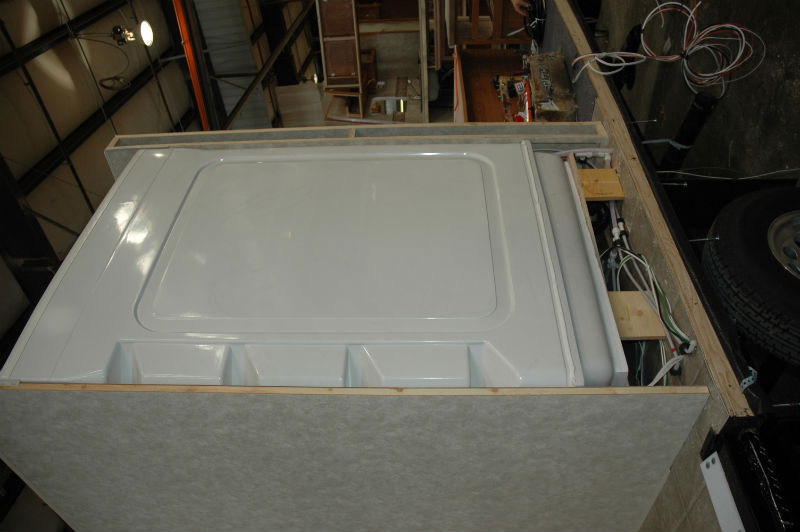
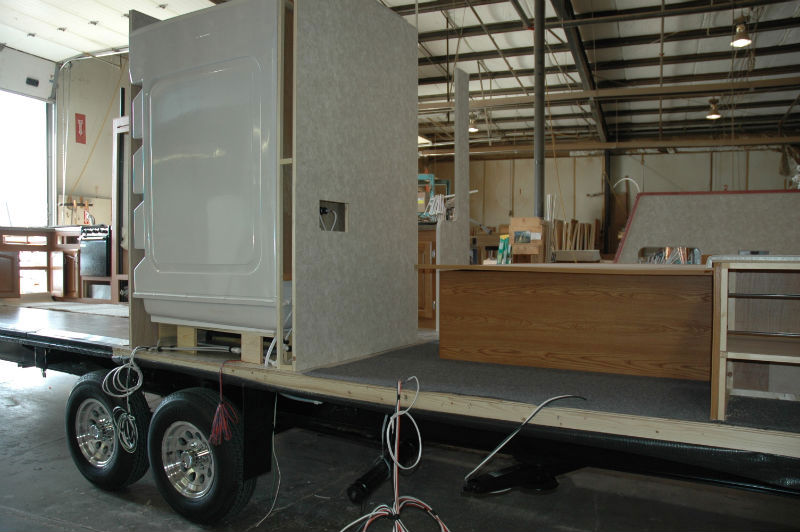
Another photo of the shower enclosure. The walls are constructed in another part of the plant - photos on that process are further down the page.
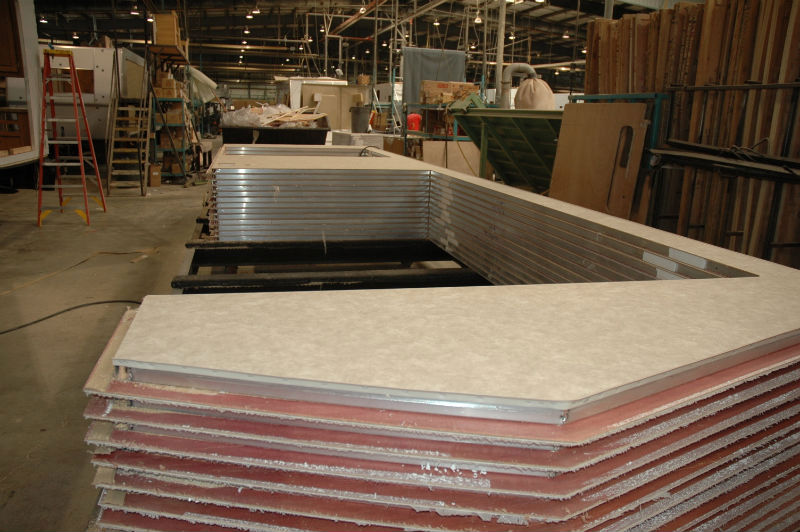
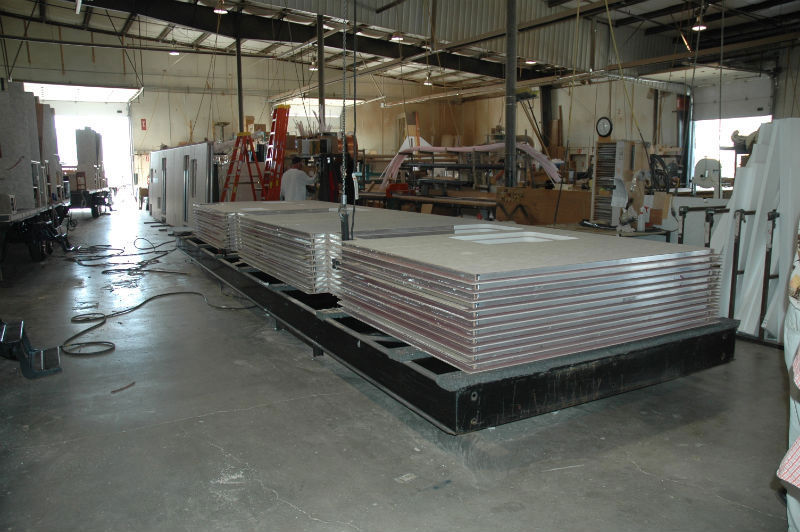
A stack of exterior walls ready to be installed.
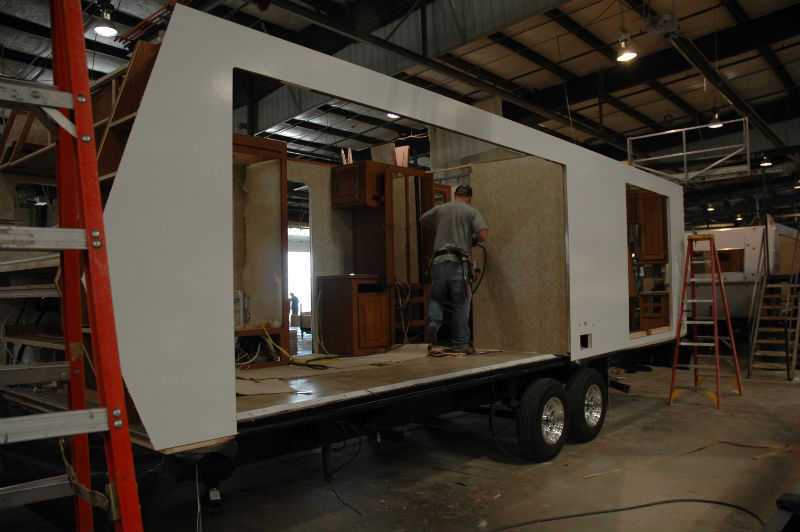
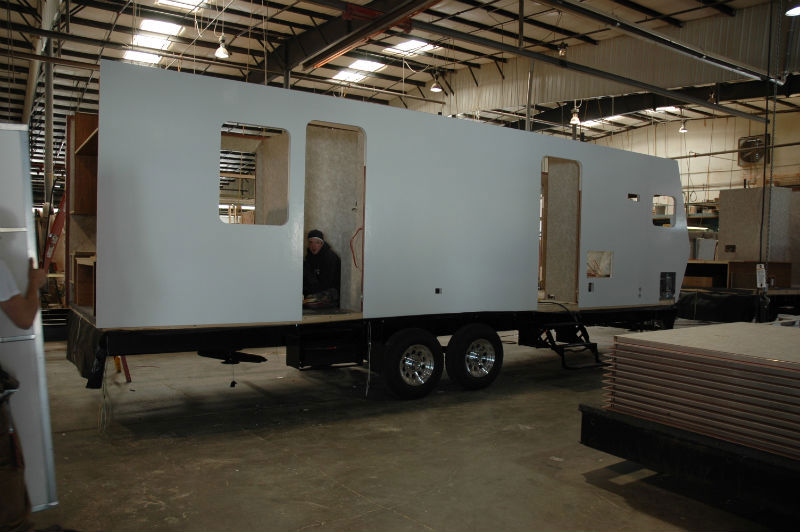
The next coach in the line has its exterior walls installed
The front of a 29V with sidewalls, but no front walls yet.
Another view of the front of the 29V
The bedroom taken through the bedroom's wardrobe slide

The front walls installed. Note that the front cap on a 29V is pretty much just decoration. Under that cap is a regular wall built just like the sidewalls. There's about 1-2" of airspace between the front cap and the front wall
Another stack of side walls.
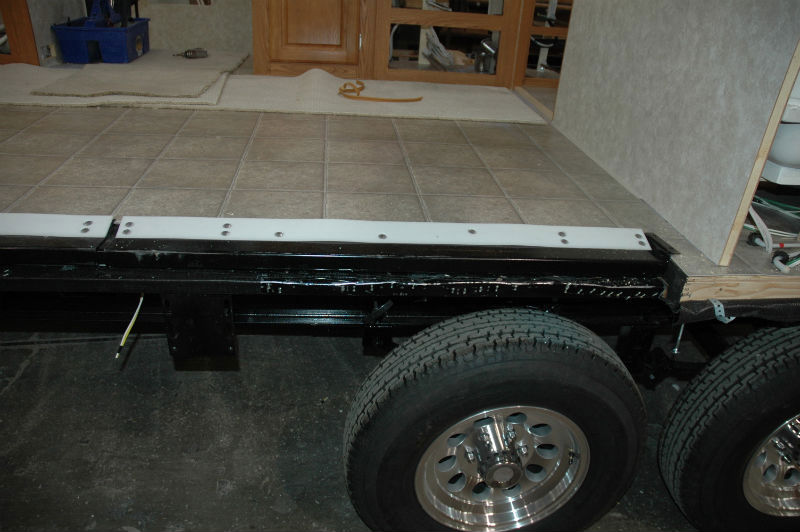
Side wall on. NOte the water proof fabric that wraps around the floor structure will be wrapped up the side wall and covered with trim, completely encasing the floor & bottom edge of the sidewalls.

More of the sidewall installation phase
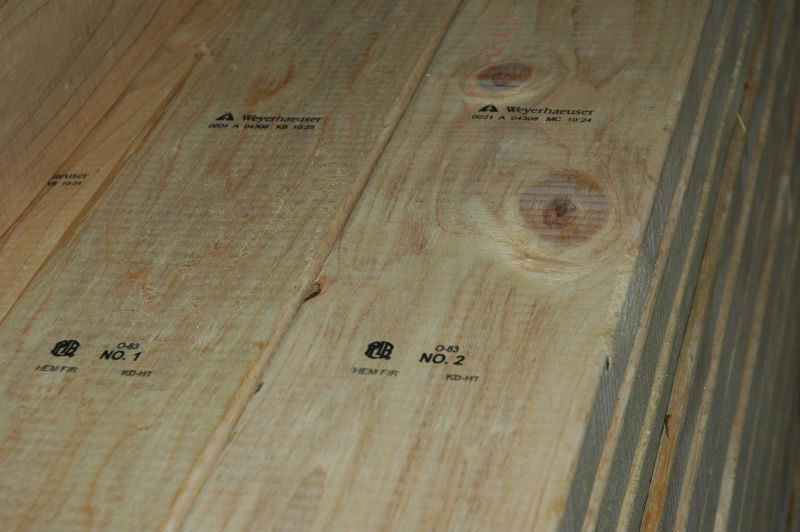
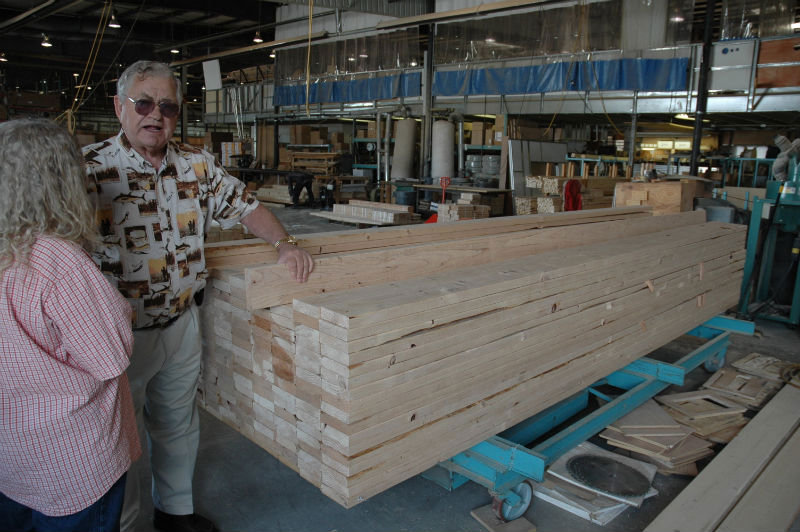
Ted explains how Northwood buys lumber and then rips it and cuts it to length in a computer-controlled saw run by 3 guys.
.JPG)
The roof structure has been installed and this worker is installing the wiring
.JPG)
The arched roof structure is made of wood, even on the aluminum-framed 'Silver
Fox' line such as the 29V. The roof is extremely strong, lightweight and
about 1-2" thicker than most trailer roofs.
.JPG)
.JPG)
Plywood panels 3/8" thick being placed on top of the roof. You can walk anywhere on a Arctic Fox roof without worrying about damaging it. Likewise, solar panels can be easily installed anywhere.
.JPG)
.JPG)
.JPG)
.JPG)
.JPG)
Other workers continue the build under the elevated walkways for the roofing workers.
.JPG)
I believe this is a 22H under construction. The 22H like many of the other smaller and older designs has a wood-framed house.
.JPG)
More photos of the Arctic Fox 22H
.JPG)
.JPG)
Back to the 29V assembly line. The front & rear caps have been installed on these two coaches.
.JPG)
.JPG)
We've gotten past the first of the 29V models on the assembly line and caught up
with the tail end of the 30U model run.
Next, we left the assembly line and took a side trip to the shop where the walls are built.
.JPG)
A stack of walls for a 5th wheel.
.JPG)
First, a worker welds the aluminum frame together. Northwood uses aircraft aluminum and each joint is fully welded instead of spot welded.
.JPG)
Once the frame is completed, the wall is filled with foam insulation. Then, the frame & foam are sprayed with an adhesive and run through a pinch roller with a layer of the Filon external covering.
.JPG)
This completed wall is head for the CNC router. The computer controlled router will cut out every hole in the wall for windows, doors, vents, etc according to the data on the VIN of that coach. The build information on every Arctic Fox is loaded into the computer, so if a customer damages their coach, a new wall can be ordered that matches the original wall perfectly. In other RV plants that we've been in, a worker uses a hand held plunge router to cut out each hole.
.JPG)
One of the keys to Arctic Fox ruggedness is that every aluminum frames that will have something attached to it, such as a cabinet, is filled with wood. This gives the screws holding the cabinets something to bite into so they'll stay put for years.
.JPG)
.JPG)
.JPG)
A stack of axles in the yard waiting their turn to go to the frame shop.
.JPG)
Getting ready to put a ladder on the rear cap of this 30U.
.JPG)
More 30U's on the line. The 30U floorplan is very similar to the traditional 5th wheel floorplan; it has an aft entry into the living room with two rocker recliners in the rear of the coach & lots of windows.
.JPG)
Back to the 29V production run, we find a couple of coaches with their rear caps installed.
.JPG)
.JPG)
The 29V bedroom through the wardrobe slide.
.JPG)
This view of the 29V's kitchen looks almost like a photo op for a brochure.
.JPG)
Another view of the 29V's livingroom.
.JPG)
The front cap has been installed on these two 29V's
.JPG)
A 30U getting its graphics put on.
.JPG)
Another 30U on the line.
.JPG)
A peak into the front bedroom of the 30U.
.JPG)
The photos above and below show some of the detail of the slide opening. Nicely down with large seal around the perimeter.
.JPG)
A bit of a close-up of the slide sealing details.
.JPG)
.JPG)
Ted shows CJ the triple seals on the wardrobe slide. What's missing is the massive interior frame that will be added after the slide is inserted into the coach. Unlike other RV's that have a shallow interior flange similar to the outside flange on the slide above, the Arctic Fox's have a 2" thick x 4" wide interior flange for extra strength.
.JPG)
I had some more photos, but they got lost in the shuffle somewhere.
After the coach is completed, it goes to the quality control shop across the driveway. Everything is checked before the coach is ready for shipment to the dealer. Two examples of the QC checks done are:
 | The electrical system is checked out to make sure that the battery charging system works according to specifications, among other electrical checks, |
| The coach is pressure tested for leaks. A fan is connected to one of the vents to pressurized the coach. Then the entire coach is sprayed with a soap solution to check for bubbles indicating air leaking out. If no air leaks out, then water shouldn't be able to leak in. |