Wet Bay Re-design Project
One lovely Friday afternoon in the Fall of 2006 we we pulled into Camp Beaver at the Bend, Oregon dealership. The plan was to have some cabinetry modifications done on Monday. Since we had been dry camping for the previous week, we pulled up to the dump station before settling into one of the sites for the weekend. When we removed the cap from the sewer drain pipe we quickly discovered that our black tank valve had broken & we had an uncontrolled leak of effluent all over. Yuk! Fortunately, we were able to find the needed parts in town so we could make repairs ASAP. When we removed the wet bay panel, we discovered that the panel wasn't as easy to remove as I thought it should be, and that there was some minor water damage to the panels. I made the decision right then that my winter project would be a complete re-design and re-build of the wet bay.
The original panels that make up the finished wet bay were a high grade pressboard with a plastic (Melamine?) finish. It worked fine as long as water couldn't get past the plastic finish. Unfortunately, caulk doesn't last forever. Worse, the plastic finish was very thin and easily damaged. Twelve years of nicks resulted in bubbling and flaking finish in the area around the thru-deck fitting. So, the decision was made to replace the panels with 1/2" thick HDPE (high density polyethelene). The same stuff they make plastic cutting boards with. Almost indestructible.
There were also a number of other upgrades I wanted to make as long as I was at it.
| Install 2 permanently mounted "whole-house" size water filters. Leave room for the possible addition of a UV filter later. | |
| Replace the small orifice-type water restrictor in the inlet fitting with a commercial-grade water pressure regulator. Between the orifice restrictor and other restrictions in the original plumbing it took 2 hours 20 minutes to fill our 100 gallon tank at home. | |
| Add pressure gauges to monitor supply pressure, regulator pressure and pressure drop across the filters. | |
| Install an accurate holding tank gauge. We do much more dry camping with the Beaver so monitoring our holding tanks is important. | |
| Add a switch to be able to operate the water pump from the pump panel. | |
| Replace the typical RV outside shower fixture with a nice chromed brass laundry room faucet to make washing up a hands-free affair. | |
| Add electric heat to the plumbing system in the wet bay so that the holding tanks and plumbing could be kept from freezing with electricity as an alternative or back-up to the propane furnace. |

A picture of the original wet bay.
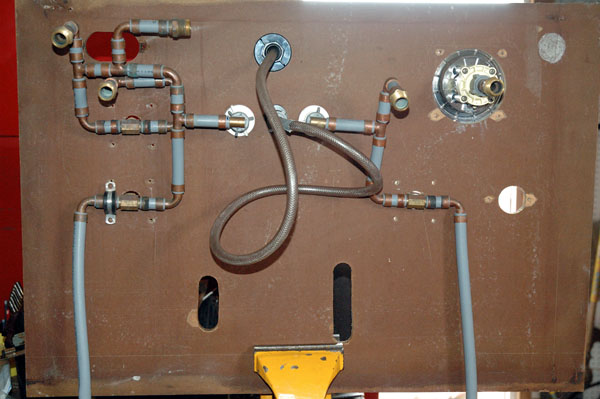
Behind the scenes of the original wet bay. All of the original plumbing was PEX with copper rings swedged in place. Very difficult to service, even if you own the expensive tool ($130). Flexible hoses with 1/4" ID connect the assorted components with the ports on the wet bay. Between the restrictors built into the inlet fitting (upper right) and the small hoses, it took well over 2 hours to fill our fresh water tank. Plus, we had lousy water pressure for showering without running the water pump to boost outside pressure. Ugh.
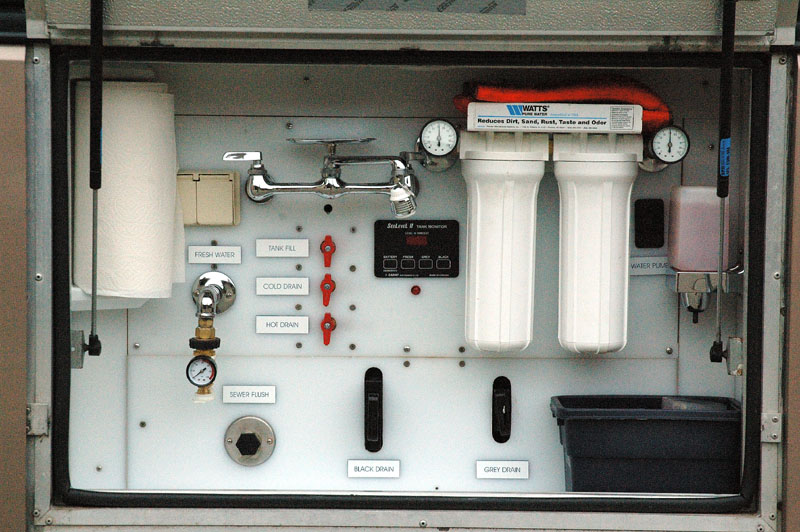
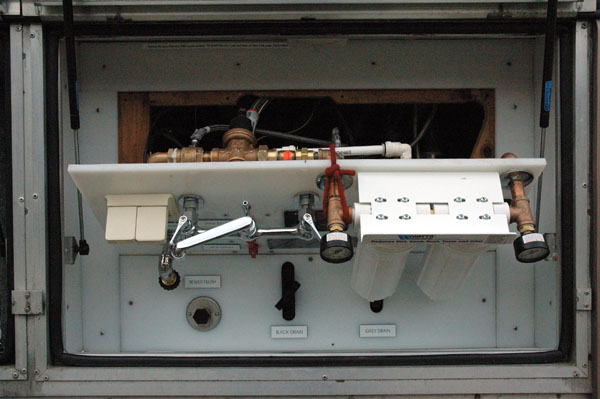
The completed wet bay.
| Panel has been split horizontally. Lower panel can be removed separately to service sewer valves or check for leaks behind panel. Upper panel is now a more manageable size and much easier to remove from the compartment. The upper panel also sort of hinges on the lower panel and can be held out about 12" by a cord behind the panel. | |
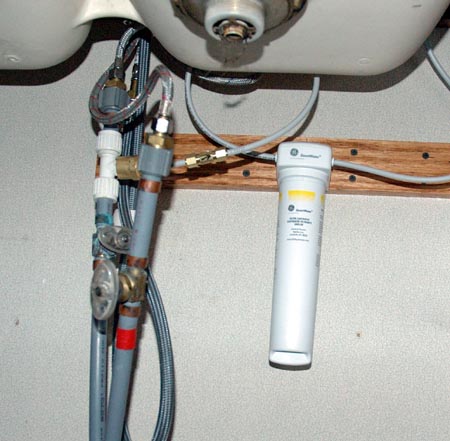
| The fresh water comes in through a hatch in the floor and connects to the quick-connect fitting at the first gauge--supply pressure. The water flows through the panel to a 3/4" brass check valve and then to a 3/4" brass pressure regulator. It then comes back through the panel to the 2nd gauge--regulated pressure. After flowing through the 10 micron sediment filter and 5 micron charcoal filter it registers on the 3rd gauge--filter pressure drop (10 PSI with new filters). Back through the panel to the various valves and devices. | |
| Water pump switch to the right of the filters next to the soap dispenser. A bright pilot light is mounted just below the SeeLevel panel. An additional water pump switch was added to the bathroom next to the toilet. | |
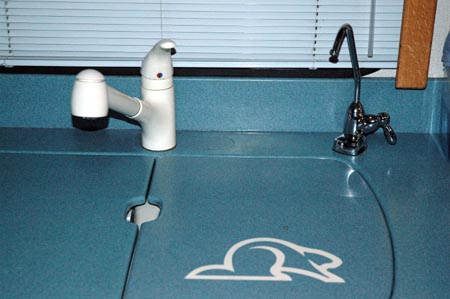
| A chromed brass laundry faucet with soap dish and swivel nozzle replaces the outside shower fixture. | |
| A SeeLevel Model 711 gauge shows VERY accurate tank levels. See the table of actual gallons vs. gauge readings here | |
| Not in view are the overhead 12v dome light and the 120V LED ribbon light mounted on the back side of the flange surrounding the compartment opening. The LED ribbon lights serve a dual purpose: illumination & compartment warming. |
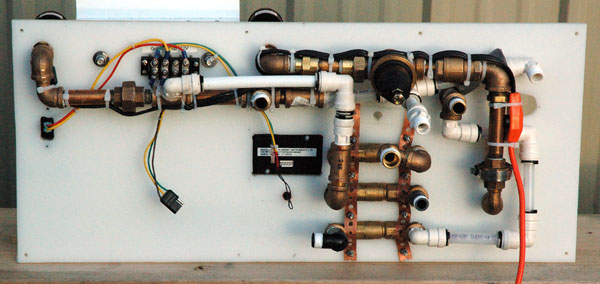
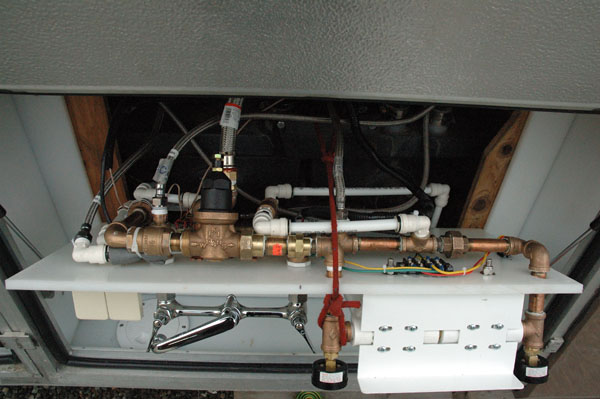
The rear view of the new panel. The plumbing is a mix of brass and SeaTech PEX fittings to cope with the 3" clearance behind the panel. It took two months and well over 100 iterations of the plumbing to solve all the clearance issues. The orange cord is a 3' heat tape on the brass piping run. An additional 6' heat tape was added to the plumbing run in the basement as well as an 18' LED ribbon light assembly around the holding tanks.
Related to the wet bay project . . .
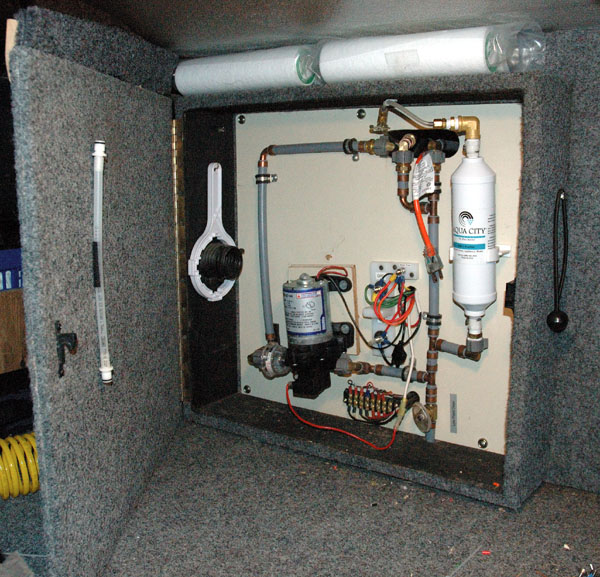
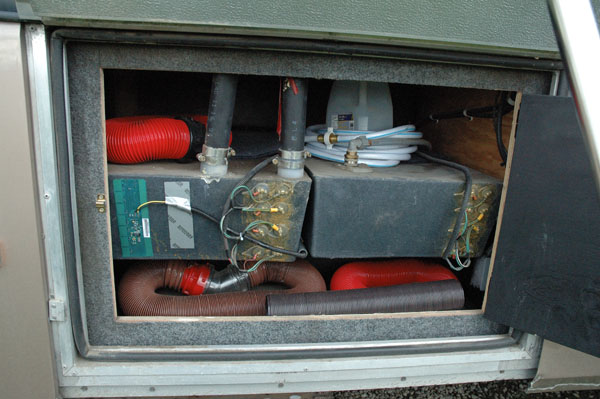
The water pump compartment is located in the basement just forward of the wet bay. The ice maker filter was replaced with a larger and higher quality filter. Spare filters for the main water filters are stored on top of the water pump compartment. The tubing velcroed to the door is the winterizing bypass for the ice maker filter.
Service Access
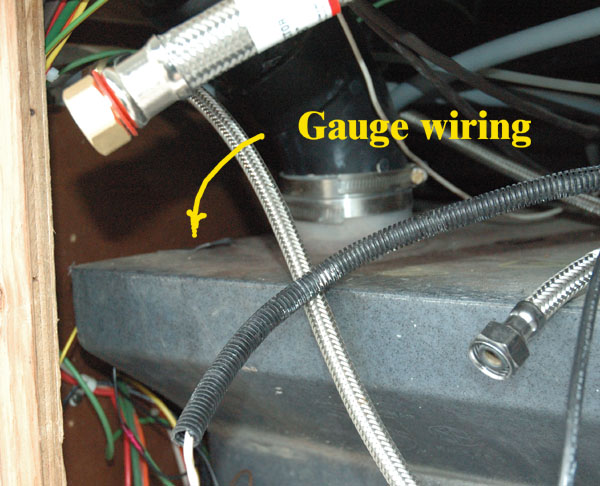
Service access to the top panel is achieved by removing the 6 screws holding the panel in place, then tilting the panel out. A loop of red rope is secured to the tank mounting bracket and slipped over the pressure gauge to hold the panel in place. To remove the panel, disconnect the stainless steel jacketed flex hose and unplug the wiring connector and lift out the panel.
This photo shows a better view from above as if you were really looking behind the panel.
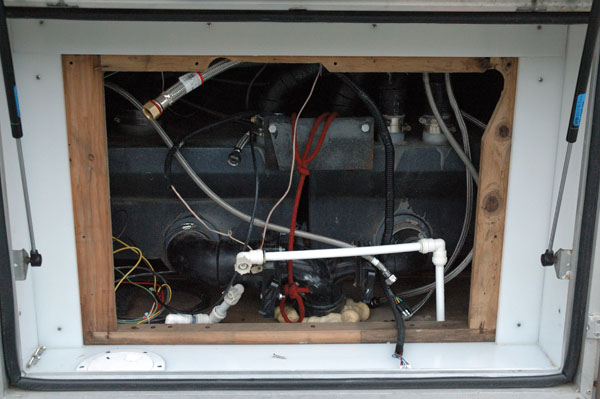
This photo shows what it looks like with both panels removed. This photo was taken before I switched from PEX tubing cold and hot water drain lines to stainless steel jacketed flex hoses.
Note the difference in depth between the deep end of the tanks above with their drain troughs leading to the discharge port and the shallow ends in the image below.
This photo shows the holding tank access on the curb (right) side of the coach. This is the shallow end of the holding tanks. You can see the new SeeLevel gauge sending unit at the far left of the photo and the OEM sensors to the right of each tank. Both systems are still active. The SeeLevel sender for the grey tank is cut to 7" to fit the shallow end.
This photo just barely shows the wiring for the SeeLevel black tank sender. Actually, what you are seeing is a piece of duct tape that holds the sending unit wires properly in place to the right of the sending unit. The SeeLevel gauge is cut to 9" on the black tank since I was able to install it at the deep end of the tank.
Originally, Beaver built the coach with the grey carpeted panel secured by screws. I changed it to hinges & a barrel bolt for better access to the inside. Obviously, I use the compartment to store extra sewer hoses and paraphenalia.
The new filter assembly before the shelf was reinstalled.

A fiddle was built around the filter to protect it from sliding pots & pans as well as keeping smaller things from falling through the hole.
The original drinking water filter and dispenser was very high quality and expensive--over $400. Unfortunately, the combination ceramic/charcoal filter element was broken and not serviceable, so I replaced both the filter and dispenser with something a bit more affordable. Considering that this is the 3rd filter that our drinking water passes through, it seems reasonable.
The SeeLevel gauge and OEM gauges were calibrated by dumping 5-gallon buckets of water at a time into each holding tank. For the black tank I changed the level by only 1 gallon at a time between 45 and 50 gallons. The coach at a list of 1/8" per foot with the deep end of the holding tanks lower than the shallow end. This slightly exaggerated the already exaggerated differences between the locations of the SeeLevel sending units. One of these days when I've got nothing better to do, I'll calibrate each tank one gallon at a time, but with the coach perfectly level.
| Holding Tank Capacity vs. Gauge Reading | |||||
| Gallons | Grey Tank | Black Tank | % of 40 gal | ||
| Wet Bay | Cab | Wet Bay | Cab | ||
| 62 | Overflow | 155% | |||
| 61 | 153% | ||||
| 60 | 100 | F | 150% | ||
| 59 | 148% | ||||
| 58 | 145% | ||||
| 57 | 143% | ||||
| 56 | 140% | ||||
| 55 | 100 | F | 138% | ||
| 54 | 135% | ||||
| 53 | 133% | ||||
| 52 | Overflow | F | 130% | ||
| 51 | 128% | ||||
| 50 | 86 | 3/4 | 94 | F | 125% |
| 49 | 123% | ||||
| 48 | 120% | ||||
| 47 | 118% | ||||
| 46 | 115% | ||||
| 45 | 71 | 3/4 | 94 | 3/4 | 113% |
| 44 | 100 | 3/4 | 110% | ||
| 43 | 94 | 3/4 | 108% | ||
| 42 | 94 | 3/4 | 105% | ||
| 41 | 92 | 3/4 | 103% | ||
| 40 | 61 | 1/2 | 89 | 3/4 | 100% |
| 39 | 98% | ||||
| 38 | 95% | ||||
| 37 | 93% | ||||
| 36 | 90% | ||||
| 35 | 50 | 1/2 | 86 | 1/2 | 88% |
| 34 | 85% | ||||
| 33 | 83% | ||||
| 32 | 80% | ||||
| 31 | 78% | ||||
| 30 | 39 | 1/2 | 72 | 1/2 | 75% |
| 29 | 73% | ||||
| 28 | 70% | ||||
| 27 | 68% | ||||
| 26 | 65% | ||||
| 25 | 29 | 1/4 | 64 | 1/2 | 63% |
| 24 | 60% | ||||
| 23 | 58% | ||||
| 22 | 55% | ||||
| 21 | 53% | ||||
| 20 | 7 | 1/4 | 56 | 1/4 | 50% |
| 19 | 48% | ||||
| 18 | 45% | ||||
| 17 | 43% | ||||
| 16 | 40% | ||||
| 15 | 0 | 1/4 | 44 | 1/4 | 38% |
| 14 | 35% | ||||
| 13 | 33% | ||||
| 12 | 30% | ||||
| 11 | 28% | ||||
| 10 | 0 | E | 42 | E | 25% |
| 9 | 23% | ||||
| 8 | 20% | ||||
| 7 | 18% | ||||
| 6 | 31 | E | 15% | ||
| 5 | 0 | E | 28 | E | 13% |
| 4 | 10% | ||||
| 3 | 8% | ||||
| 2 | 5% | ||||
| 1 | 3% | ||||
| 0 | 0 | E | 0 | E | 0% |
Updated 11/25/2007