Flushing the Cooling System
After repairing the radiator, we began having problems with high coolant temperatures. Previously, the engine had run at a steady 180-185 degrees Fahrenheit. Pulling 6% grades with the toad in the summer never raised the temperature above 185. Now, we were seeing 200-215 with frequent & rapid temperature changes. At first, the rapid changes suggested a malfunctions thermostat. We removed the thermostats and tested them. They performed properly, but we changed both thermostats anyway. Roadtesting the coach proved that the thermostats were not the problem, so we decided to seriously flush the cooling system. We thought that perhaps some of the nearly 1# of black pepper we put in the cooling system to limp home from Utah might be obstructing a passage or thermostats.
The process was begun by removing the thermostats so that the coolant could flow freely both ways. Next, we fabricated two adapters to connect a garden hose to either the engine thermostat housing or the lower radiator tank. By alternating which connection we ran water into, we continually reversed the flow of fresh water through the cooling system to dislodge and remove the pepper. It was rather amazing how much black pepper remained in the cooling system after the radiator repair.
When we were finally done, we reinstalled the
thermostats and road tested the coach again. Hmmm, we still had the same
problem! The next step was to test the actual coolant temp. We did that by
attaching the thermal probe for my Fluke DVOM to the aluminum pipe in the upper
radiator hose system.
The Fluke DVOM indicated a steady 180-185 degrees, while the dash water temperature gauge fluctuated wildly. The solution was to replace the dash gauge. Problem resolved!
Flushing the Radiator Images
Detailed photos of deaeration system are here.
Start by draining the radiator using the radiator petcock at the lower radiator tank.
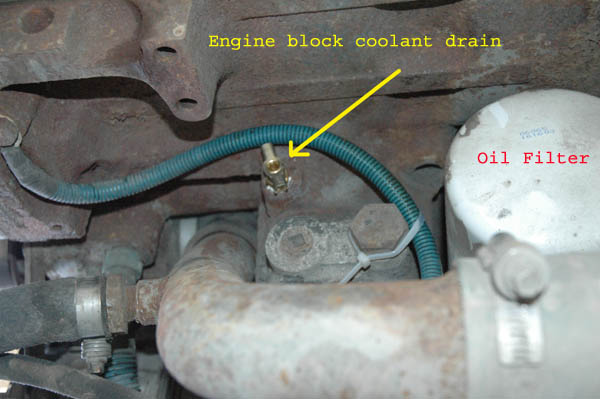
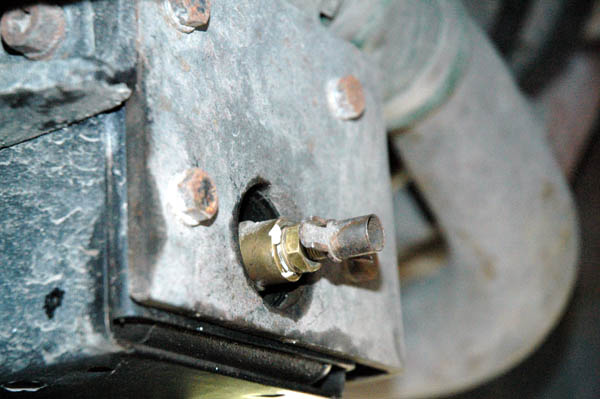
Next, drain the engine block. The engine block drain petcock for the Cummins C8.3 is under the oil cooler next to the oil filter.

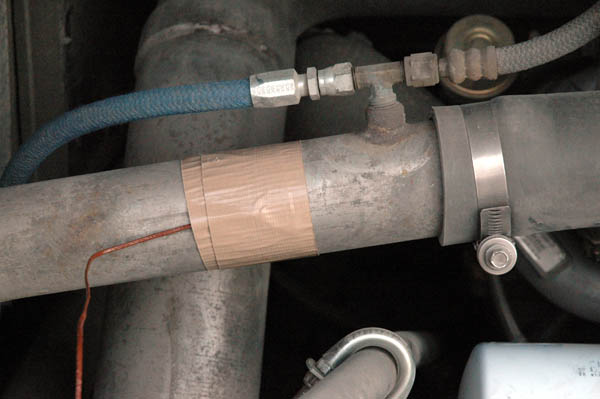
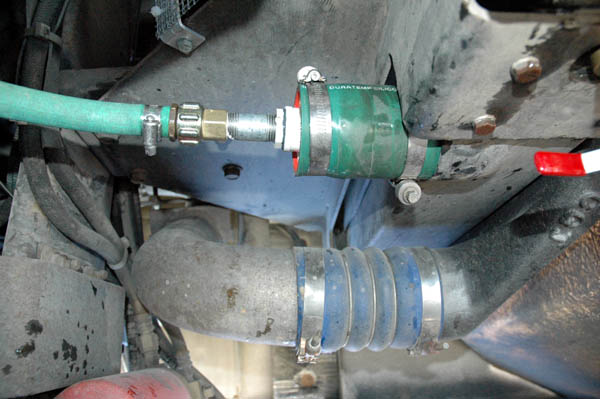
This images shows the PVC adapter we fabricated to connect the garden hose to the upper radiator hose. The upper radiator hose has been disconnected from the thermostat housing water outlet tube & rotated to point to the rear to make the connection. The water flow from this connection will be in the 'normal' direction.
This garden hose was connected to our irrigation system, not your usual domestic water system. In our case, that means over 100 PSI static and well over 40 PSI at full flow, creating a powerful flushing of our cooling system.
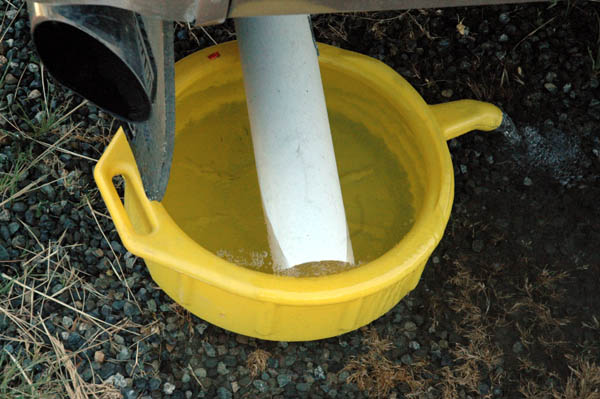
When the garden hose is connected to the upper radiator hose in the normal direction, the water exits the cooling system at the lower radiator hose connection. We've placed a PVC pipe over the lower radiator hose to both collect debris from the cooling system and to minimize splash.
A second PVC connector was made to connect the garden hose to the lower radiator outlet. The water flow is reversed when this connection is used.
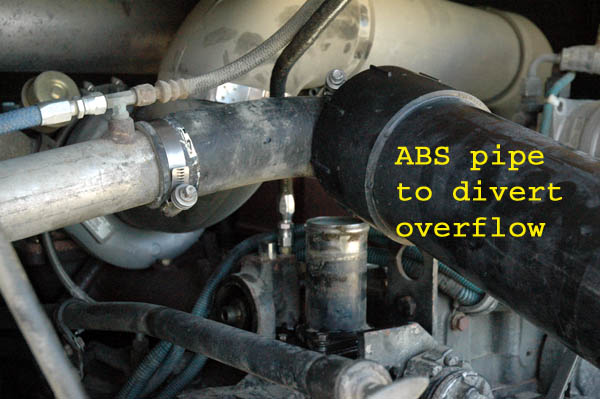
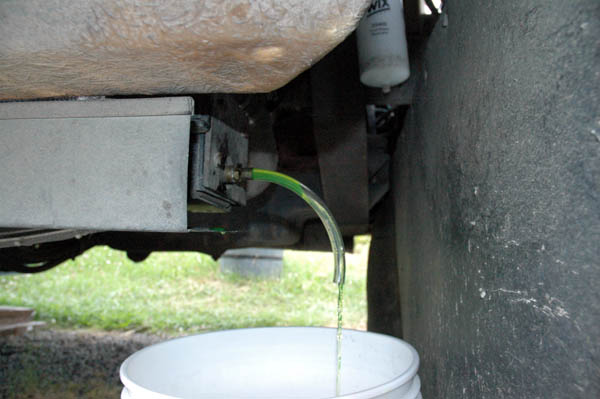
Another pipe, this time a black ABS pipe is positioned over the upper radiator hose to divert the flow of water exiting the cooling system into a drain pan. Again this was done to collect any debris from the cooling system and to minimize splash,
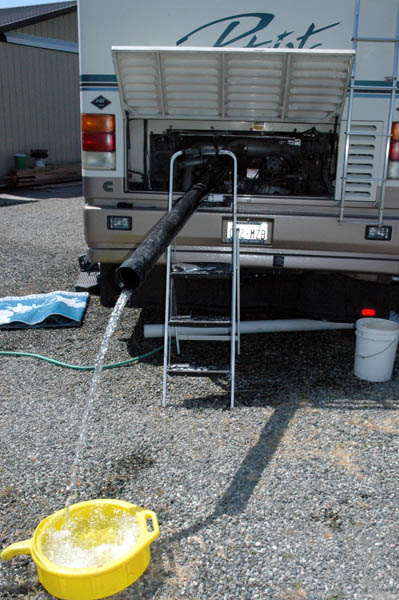
A view of the water running out of the cooling system in the reverse direction.
Deaeration System & Miscellaneous Cooling System Photos
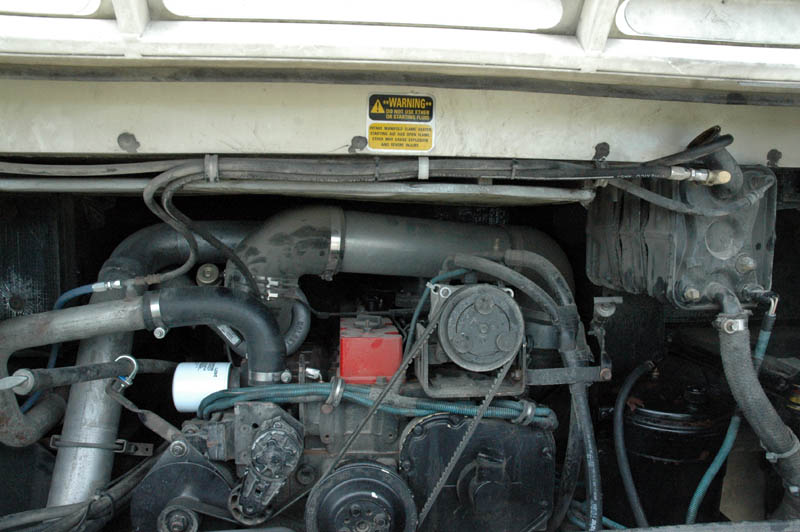
An overview image of the engine and many cooling system components: upper radiator hose, coolant filter, thermostat housing bleed line, radiator deaeration line, upper radiator hose deaeration line, deaeration tank, water pump deaeration return, low coolant sensor, deaeration tank sight glass, radiator fill.
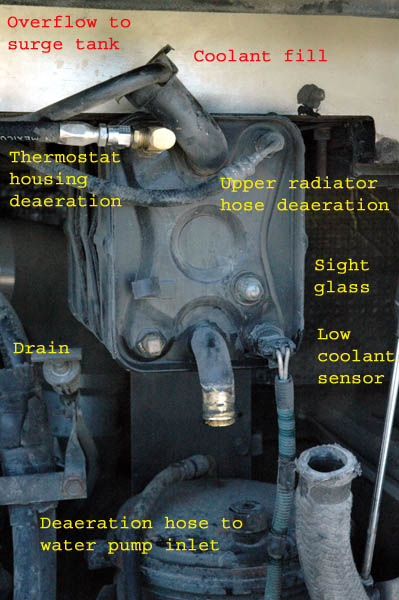
Annotated image of deaeration tank.
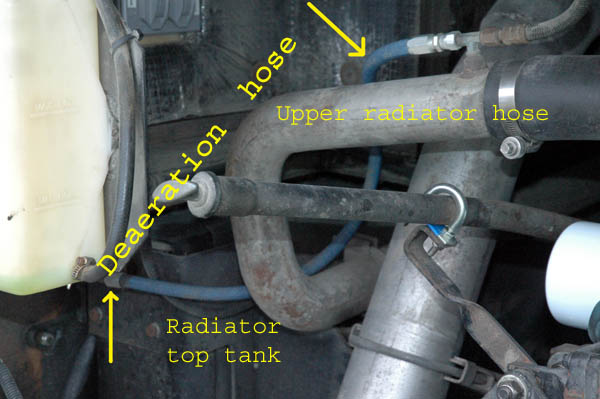
Radiator deaeration line between radiator top tank and high-point in upper radiator hose
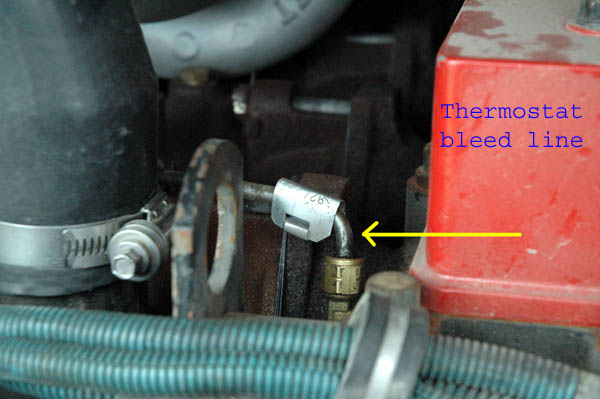
Thermostat bleed connection to cylinder head
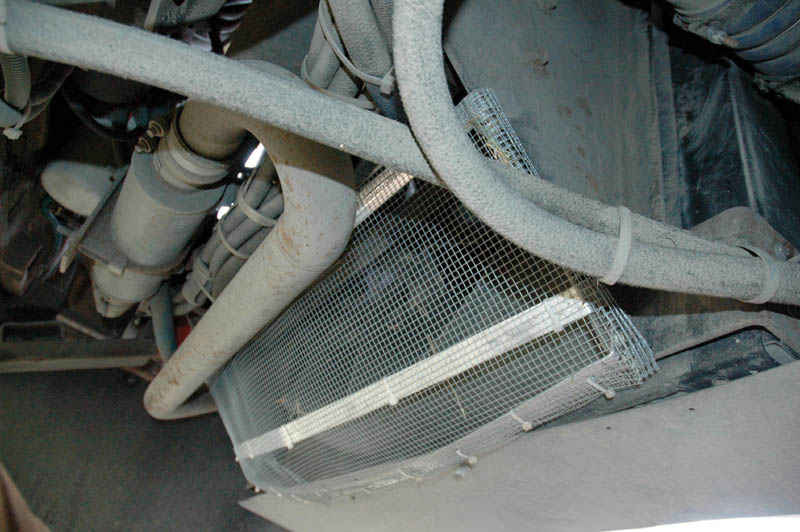
This image shows the rock guard we built to prevent rocks from being able to damage the radiator. We designed in a slight bow so that any small stuff could settle out and fall out of the bottom of the guard.
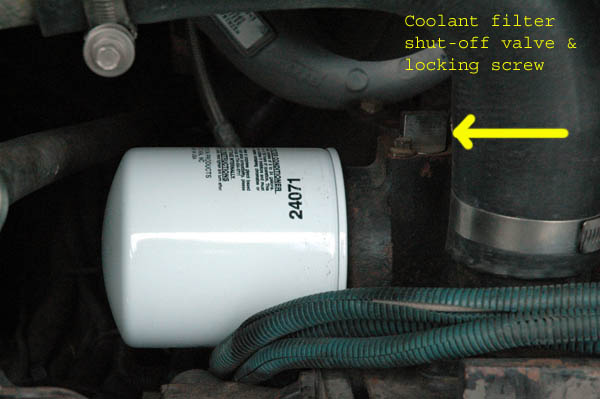
Engine coolant filter & filter shut-off valve. The original shut-off valve on our engine was made of glass-reinforced plastic and would not rotate in the thermostat housing. It was replaced with the new design valve made of stainless steel.